Wednesday, April 27, 2011

Chocolate Chip Cookies


If you only make one thing from my blog, make these cookies! I cannot explain how amazing they are!  Thick, chewy, HUGE, chocolate...YUM YUM YUM!!!  I adore these cookies-the only down side is that they are best when devoured the day you make them. Which isn't much of a bad thing because they won't last until the next day anyway :)

I have made many chocolate chip cookies in my day and none compare to these! I was actually on a quest one Saturday morning, "researching" on the Internet, trying to find the best recipe.  After about two hours of google searches I had the bright idea of looking at all my favorite blog sites (DUH, blonde moment, totally should have done this first).  Lo and behold, I found it here: Brown Eyed Baker.  I will never make another chocolate chip cookie again, unless it's this recipe.  There is one big key to these cookies: GOOD QUALITY INGREDIENTS!  I am all about buying generic/cheaper products with the exception of a few things-two of them are in these cookies: vanilla extract and chocolate.  Now, I always used the store brand chocolate chips and vanilla extract until after reading a few blogs I was convinced I would try the better brands and prove them wrong...one problem; I WAS WRONG! When it comes to vanilla extract and chocolate you MUST buy good quality.  It truly makes all the difference and once you've used the good stuff you won't turn back!
Chocolate Chip Cookies
Source: Brown Eyed Baker
Printable Recipe

yield: about 18 large cookies

Ingredients:
2 cups plus 2 tablespoons (10 5/8 ounces) unbleached all-purpose flour
1/2 teaspoon baking soda
1/2 teaspoon salt
12 tablespoons (1 1/2 sticks) unsalted butter, melted and cooled until warm
1 cup packed (7 ounces) light or dark brown sugar
1/2 cup (3 1/2 ounces) granulated sugar
1 large egg plus 1 egg yolk
2 teaspoons vanilla extract
1-1 1/2 cups semisweet chocolate chips  (I don't actually measure them, I just pour them in until I think there are enough)

Directions:

Preheat oven to 325 degrees F. Line 2 large baking sheets with parchment paper, baking mat, or spray them with nonstick cooking spray.

Whisk the flour, baking soda, and salt together in a medium bowl; set aside.

Either by hand or with an electric mixer (I use my stand mixer b/c I can just turn it on and let it do all the work), mix the butter and sugars until thoroughly blended. Beat in the egg, yolk, and vanilla until combined. Add the dry ingredients (I do this in two to three additions) and beat at low speed just until combined. Stir in the chips to taste. 

I'm in love with these silpat mats
Roll a scant 1/4 cup of the dough into a ball. Hold the dough ball with the fingertips of both hands and pull into 2 equal halves. Rotate the halves 90 degrees and, with jagged surfaces facing up, join the halves together at their base, again forming a single ball, being careful not to smooth the dough’s uneven surface. Place the formed dough balls on the prepared baking sheets, jagged surface up, spacing them 2 1/2 inches apart.

Bake until the cookies are light golden brown and the outer edges start to harden yet the centers are still soft and puffy, 15 to 18 minutes, rotating the baking sheets front to back and top to bottom halfway through the baking time. Cool the cookies on the sheets. Remove the cooled cookies from the baking sheets with a side metal spatula.  ENJOY!!
 

Sunday, April 24, 2011

Happy Easter!

I just wanted to wish everyone a Happy Easter!

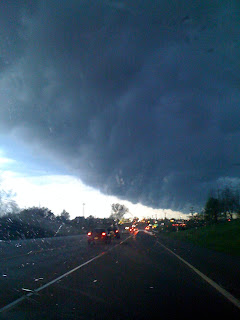
We attended our church's Saturday night service last night and it was amazing.  I probably need an "Easter" service once a month to remind me of the huge sacrifice of our Lord, Jesus Christ.  Afterward we went for a quick bite at SmashBurger-have you ever been there? It was our first visit and it was GREAT! I highly recommend it if there is one near you.  On the way home, I took some pictures out the car window and thought I would share them since they were pretty cool/scary.  We spent some of Saturday morning (3:30 AM) in our hall bathroom due to a tornado warning.  Luckily, there wasn't a tornado and we didn't have to stay in "shelter" long because our sweet dog thought it was play time and didn't understand why the 3 of us were cramped into a small room and not outside playing. Last night's storm wasn't as bad so we didn't have to go through the bathroom ordeal again :)

Anyway, here are the pictures from last night.


These were taken about 30 seconds apart! Crazy how quickly the clouds moved! 

Here's a picture of my sweet girl - apparently she wanted to do some baking....
She has really been into stealing my kitchen towels/oven mitts/potholders recently. I don't know why but she seems to enjoy carrying them through the house and putting them on my bed. HA!

Wednesday, April 20, 2011

Beef & Peppers

We made this stir fry into Asian-style burritos :) YUMMY!  I didn't have any rice noddles, which is what the original recipe called for so I just rolled this yummy beef/pepper/onion combo. up in flour tortillas and they were delicious.  I found this recipe on The Poineer Woman and like all the other things I've tried this was amazing.  I love her recipes not just because they are tasty but because they are all pretty easy to make.  During the week I just don't always feel like slaving over the stove making some big elaborate meal when it's just to feed two people!  Two people that although come home from working claiming to be starving, usually can't eat a whole serving of any meal because we are too tired and worn out :) I guess that's good on our waist line (unfortunately I make up for this by snacking at work).

If you haven't cooked with flank steak before, this is a good recipe to start!  It's pretty cheap and easy to work with and so so good!  This is a pretty fast meal that packs a lot of flavor which is something I desire after a long day at work. 


Beef & Peppers
Printable Recipe 
Adapted to feed two from: The Pioneer Woman

Ingredients

  • 1 pound Flank Steak, Sliced Very Thin Against The Grain
  • 1/2 cups Low Sodium Soy Sauce
  • 3 Tablespoons Sherry
  • 2 Tablespoons Packed Brown Sugar
  • 2 Tablespoons Cornstarch
  • 1 Tablespoon Minced Fresh Ginger (or make paste with grater)
  • 1 cloves Garlic, Minced
  • 1 teaspoon Red Chile Paste (or A Few Dashes Red Chile Oil)
  • 2 Tablespoons Canola Oil
  • 1/2 Medium Yellow Onion Sliced
  • 1 whole Red Bell Peppers, Cored And Sliced Into Rings
  • 1 Diced Fresh Jalapeno
  • Red Pepper Flakes, For Sprinkling
  • Rice Noodles (cooked by package directions) - optional

Preparation Instructions

Mix together soy sauce, sherry, brown sugar, cornstarch, ginger, garlic, and chili paste (or chili oil.) Place sliced beef in the mixture and toss to coat. Set aside.
Heat 1 tablespoon oil in a large skillet over medium-high to high heat. When it is very hot, throw in the onions and cook for less than a minute. Remove to a separate plate. Return skillet to flame, allow to reheat, and add bell pepper & jalapeno. Cook for a minute, tossing, until peppers have brown/black bits but are still firm. Remove to a plate.
Return skillet to heat and allow to get hot. Add the remaining tablespoon of oil to the skillet. Add 1/3 of the meat mixture, evenly distributing over the surface of the skillet. Allow to sit for 20 to 30 seconds, then turn with tongs. Cook for another 30 seconds, then remove to a separate plate. Repeat with remaining meat until all brown.

Reduce heat to low. Add all meat, onions, and peppers to the skillet and toss to combine. Pour in remaining sauce (the sauce the meat marinated in) and stir. Allow to simmer on low for a few minutes. Sauce will slowly thicken. Turn off heat.

Toss with rice noddles if desired  & ENJOY!


Monday, April 18, 2011

Cream Cheese Cinnamon Rolls

After several failed attempts at one cinnamon roll recipe (I'm not going to say which one b/c it's supposed to be a no-fail amazing recipe) I finally threw in the towel and went on the hunt for another one-one that I could make! HA!  I don't know what my problem had been, I followed the directions exactly as they were printed in my cookbook but after four failed attempts, and 2 full bags of flour wasted, I gave up.  I don't like giving up, especially not on a recipe, I will usually keep trying until I have it mastered but this time it was just too much.  I found this great recipe on a favorite blog of mine Joy the Baker.  If you haven't checked it out, you need to...RIGHT NOW :) I did a little bit of editing to suite my tastes and what I had on hand and these were a HUGE success!

These cinnamon rolls makes a great breakfast, better snack, or good supper :) If you're into eating sweets as a meal, which I am.

Warning: If you make these, your kitchen might look like a war zone-or maybe only mine did:


The mess is worth it, trust me!

Cream Cheese Cinnamon Rolls

Adapted from Joy The Baker
Printable Recipe 


For the Dough:
1 1/4oz package active dry yeast
1/2 teaspoon, plus 1/4 cup sugar
1/2 cup milk at room temperature
2 Tablespoons light brown sugar
1/2 teaspoon vanilla extract
1 egg
1 egg yolk
2 3/4 cups all-purpose flour, sifted, plus more for kneading
3/4 teaspoon salt
8 Tablespoons (1 stick) unsalted butter, at room temperature, plus more for the pan

For the Filling:
1/2 cup sugar
1/4 cup dark brown sugar
1 Tablespoon ground cinnamon
1/2 teaspoon salt
1/8 teaspoon ground cloves
2 Tablespoons maple syrup
4 oz. cream cheese, at room temperature
8 Tablespoons (1 stick) unsalted butter, melted

For the Icing:
2 cups confectioners' sugar
1/4 cup buttermilk
2 tbsp. heavy whipping cream

Making the Dough:
In the bowl of a stand mixer combine yeast, 1/2 teaspoon sugar and 1/4 cup water heated to 115 degrees F.  Stir to combine and let sit until frothy and foamy, about 10 minutes.

Add remaining sugar, milk, light brown sugar, vanilla, egg, and egg yolk.  Beat with a wire whisk until well combined.  Fit the bowl onto the mixer, fitting with the dough hook attachment.  Add the flour and salt and mix on medium speed until the dough just begins to come together.  Turn the machine on medium-high and knead the dough for 4 minutes.

Add the butter and continue to knead for about 6 minutes.  The dough will the wet and sticky.  Place the dough on a well floured work surface, and knead about 1/3 cup all-purpose flour into the dough.  Don't worry, the dough still might be a little sticky. Just set the dough to rest in a large greased bowl.  Cover the bowl with plastic wrap and a kitchen towel and allow to rise in a warm place for 1 1/2 to 2 hours, or until doubled in size.

While the dough rises, make the filling.  Combine the sugar, dark brown sugar, cinnamon, salt and cloves in a large bowl.  Stir to combine.  Stir in the maple syrup.  Set aside.

When the dough has doubled in size, dump if from the bowl onto a heavily floured work surface.  Gently knead the dough until it is no longer sticky, adding more flour as needed.  I think I added about 3 Tablespoons of flour.  Work the dough for about 1 or 2 minutes.  Once it's no longer sticky, place a kitchen towel over the dough and let rest for 5 minutes before you roll it out.

Using a floured rolling pin, roll the dough into a 10 x 10-inch square.

In a small bowl, mix the cream cheese with a knife until it's smooth and spreadable.
Spread the cream cheese evenly over the dough square.  Fold the square into thirds like you would fold a letter to fit into an envelope.  Take the open ends of the rectangle and fold into thirds again, to make a smaller dough square.

Invert the dough so that the seam is face down and, using the rolling pin, gently roll it into a 10 x 20-inch rectangle.  You make find that some cream cheese sneaks through.  Be as gently as possible with the dough, but continue to work it until you reach the size you need.

Turn the dough so that the short sides are parallel to you.  You're going to roll from the short sides of the dough.

Brush the top of the dough with half of the melted butter.  We'll use the rest of the butter after the rolls are baked.

Pour all of the filling onto the dough.  Spread evenly, leaving a 1-inch boarder at one of the short edges of the dough so the roll can be properly sealed.  Lightly press the filling into the dough.

Using your hands, lift up the bottom edge of the dough and roll it forward into a tight cylinder.  Place dough cylinder seam side down on a cutting board.  Using a sharp, thin knife, trim off the uneven edges.


pre-baking
 Heat the oven to 375 degrees F.  Uncover the rolls.  If you refrigerated the rolls (this is what I did), let them sit at room temperature for 15 minutes before baking.  Bake until golden brown and a toothpick inserted in the center comes out clean, about 30 minutes.

Make the icing:  While the rolls are baking, whisk together the sugar and buttermilk in a small bowl until smooth, then add heavy cream if desired. 
Transfer the pan of cinnamon rolls to a cooling rack.  Brush with remaining butter.  Let cool for 5 minutes.  Dip the tines of a fork into the icing and drizzle over the rolls.  Serve immediately.

 SO YUMMY! A special thanks to my baking buddy: Greta, without her assistance, I could bake in peace ;)

Sunday, April 17, 2011

New Cookbooks

I won a Barnes & Noble gift card at Steve's work Christmas party this year and forgot about it until last week-when I cleaned out  my wallet; what a great surprise!  There were two cookbooks I had been wanting and when I saw how dirt cheap they were I got both of them and a 3rd and it only costs me $8.00 of my own money :) I haven't made anything from them yet but it won't be long and I'm sure I will be sharing some goodies on here.  Don't know if any of you like cookbooks but I am a bit of a collector, and not just cookbooks, books in general.  I'm ashamed to say I have NEVER used my local library to check out books, for some reason I have this "need" to own them and have them placed on my bookshelf.  I don't mind lending out my books, as long as the borrower knows it must be returned :) Anywho, here's my loot:

I have read rave-reviews on this

Can you see that price tag? $9.00!!!!

Only $6.00!!!
I had been coveting the "Artisan Bread in 5 Minutes a Day" book after reading about it on several food blogs and the "Frame by Frame Baking" was featured on a few blogs as well, "The Organic Seasonal Cookbook" was too cheap to pass up and it has some great looking pictures! I'm all about the pictures.  The only thing I don't LOVE about the bread cookbook is that there isn't a picture with every recipe :)  I love a good deal and when it comes to books, especially cookbooks, you can NEVER have too many!  I can't wait to put these to good use and share some recipes with y'all. 

Saturday, April 16, 2011

And The Winner Is.......

The winner of the "Get Spring Started" giveaway is....... LAUREN from the blog Everyday Sunshine!  Please e-mail me no later than 10:00PM Sunday with your mailing address so I can get your prize to you :) Congratulations to Lauren and thank you to everyone who entered.

Thursday, April 14, 2011

Snickers & Reese's Cheesecake

I love sweets, dessert is definitely my favorite part of any meal.  Although it's a tough choice, cheesecake takes 1st Prize as my favorite dessert :)  When I saw this recipe on My Baking Addiction it was put on my must-make list and I have made it several times.  I had tried several different basic cheesecake recipes and although they were good, they were far more time-consuming and none turned out as good as this one.  This is my go-to recipe for any basic cheese and it can be jazzed up with candies or you can change up the basic trust with a chocolate crust too.
snickers cheesecake
The first time I made the snickers cheesecake (my favorite), the second time it was for my husband's birthday and he requested a Reese's variation.
Reese's
Snickers Cheesecake
Crust:
2 cups graham cracker crumbs (regular or chocolate)
1 stick unsalted butter; melted
3 tablespoons sugar
½ teaspoon salt

Cheesecake:
4 sticks of cream cheese, 8 oz each; room temperature
1 ¼ cup granulated sugar
4 large eggs; room temperature
3/4 cup heavy cream
1 tablespoon pure vanilla extract

Topping:
20 Mini Snickers; cut in fourths
1/3 cup roasted peanuts; chopped
1/4 cup caramel syrup

Directions:
1. Preheat oven to 350 degrees F. Tightly wrap a 9 inch springform pan in heavy duty foil. This step prevents leaks when using a water bath. You may want to place your foiled springform pan in an oven baking bag.- This ensures no water getting to your crust.
2. Mix together the crust ingredients and press into the bottom of your pan and about 1 inch up the sides. Bake for 7 minutes and cool completely on a wire rack.
3. Begin to boil a large pot of water for the water bath.
4. In the bowl of your stand mixer fitted with your paddle attachment, combine the sugar and cream cheese and cream together until smooth. Add eggs, one at a time, fully incorporating each before adding the next. Make sure to scrape down the bowl in between each egg. Add heavy cream and vanilla and mix until smooth.
5. Pour batter into prepared crust. Place pan into a larger pan (roasting pan if you have one, I used a disposable one) and pour boiling water into the larger pan until halfway up the side of the cheesecake pan.
6. Bake 45 to 55 minutes, the edges will appear to be set, but the center will still have some jiggle to it. At this point, close the oven door, turn the heat off, and let rest in the cooling oven for one hour. After one hour has passed, carefully remove the cheesecake from the water bath and place on a cooling rack to cool completely. Once the cake is completely cooled, place it into the refrigerator for at least 5 hours.
 7. Top with Snickers bars, peanuts and caramel.

*If you want to use Reese's instead of Snickers, chop about 20 small Reese's candies with a food chopper and sprinkle on top of cheese cake*

Storage:
A tightly covered cheesecake can be stored in the refrigerator for up to five days. The cheesecake can be stored for approximately 2 months in the freezer. I recommend you freeze this variation without the topping (Snickers, peanuts, caramel). To defrost, allow cake to defrost in the refrigerator overnight.

Wednesday, April 13, 2011

Fruit Pizza

Spring has finally sprung, or at least for a week!  The weather here has been warm, accompanied by spring showers.  I'm not a big fan of the rain but I am looking forward to seeing my flowers bloom :) Here in Kentucky the weather changes from day to day.  Yesterday for example:  when I went to work it was almost 70 degrees, at lunch it was in the lower 60's! Today it's warmer again and should continue to stay warm, at least until this weekend.  We have had April snows before and sometimes we get a day or two of 70 degree weather in January! You just never know what you're gonna' get.  Keeps you on your toes and surprised, that's for sure. 

Anyway, I am very happy that it's getting warm and because of this I have been looking through all my recipes that include fresh fruits and veggies :) Here is one of my favorites and it's so super easy!  I got this recipe from a lady I used to work with, she made them better (although I use the exact recipe) somehow hers managed to always taste better than mine!

Peggy's Fruit Pizza
Printable Recipe

Ingredients:
1 Pillsbury sugar cookie package (pre-cut)
1 brick cream cheese (8 oz)
2 tbsp FRESH lemon or lime juice (do not use the store bought stuff, there is a huge taste difference)
1/2-3/4 cup powder sugar
strawberries
blueberries
kiwi

*you can use any fruits you like, these are just what I prefer*

Directions:

Bake the sugar cookies according to package directions on cookie sheet (If you would like to make one large pizza, allow cookie dough to soften then roll out into a circle or rectangle, bake on a cookie sheet or pizza pan with same package directions)

In a large bowl (a stand mixer makes this super easy) mix together cream cheese, 2 tbsp lemon or lime juice, & powder sugar

Stir the icing until creamy and spread on to cookies with spatula

Add your fruit of choice to cookies & ENJOY!

Keep refrigerated up to 3 days in air-tight container (you won't make these last 3 days, TRUST ME)

Don't forget to enter my giveaway before Friday, if you haven't already done so!

Sunday, April 10, 2011

Get Spring Started Giveaway!

I don't know about you guys but I am so ready for Spring! It's been far too cold here in Kentucky this winter.  So I am very excited about the warmer weather.  I'm really looking forward to planting a small garden in my back yard so I can have my own fresh produce :) Do you any of you have plans for a garden?


It's GIVEAWAY time!
I love cloth napkins and when I saw these I thought they would make a cute little gift for a giveaway.  I also found a matching oven mitt and pot holder to go along with them.  This giveaway includes:

1 oven mitt
1 pot holder
12 napkins

I love the fresh green color of these and they definitely put me in the mood for spring cooking!

Rules:  
Leave a comment on this post by answering the question:  What's your favorite spring-time activity?

For extra entries:  become a follower of my blog, post this giveaway on your blog or a facebook post. 

For each extra entry, please leave an additional comment!

Giveaway will end Friday, April 15th at 10:00 PM  

I will announce the winner (chosen at random) Saturday, April 16th! GOOD LUCK :)

*The winner needs to email me with their shipping information by April 18th, 10:00 PM or another winner will chosen.

Saturday, April 9, 2011

One Month of Blogging

I've been blogging for one month. WOW, it's gone by so fast!  Make sure you come back and visit my blog tomorrow for my first give-away!

It's raining :( I guess we need the rain, so I should be happy.  Unfortunately, the satellite lost signal and as a result, "Dessert First" didn't record.  That makes me a very sad girl; luckily there are always re-runs! While Steve tried to beat the rain to do some much needed yard work, I got started on this yummy recipe found on The Pioneer Woman's blog.  My sister-n-law found this recipe and forwarded it on to me. Thanks Britney.


My oven turned off twice while baking this dish, but all is well that ends well and this yummy bake did end very well.  I know the pictures don't do it justice, trust me it's very good!  It's yet another super easy and quick meal that you need to add to your arsenal!


Sour Cream Noodle Bake
  
Printable Recipe 
Source: The Pioneer Woman

Ingredients:

1 1/4 lb hamburger
1 (15 oz) can tomato sauce
1/2 tsp salt
freshly ground black pepper
8 oz (weight) egg noddles
1/2 cup sour cream
1 1/4 cup small curd cottage cheese
1/2 cup slice green onions
1 1/2 cups sharp cheddar cheese, grated

Instructions:

Preheat oven to 350 degrees F

Brown hamburger in large skillet.  Drain fat, then add in tomato sauce, 1/2 tsp salt and lots of black pepper.  Stir, then simmer while you prepare the other ingredients

Cook egg noddles until al dente (about 7-8 minutes).  Drain and set aside

In a medium bowl, combine sour cream and cottage cheese, & lots of black pepper.  Add to noddles and stir.  Add green onions and stir again.

To assemble, add half the noddles in a baking dish.  Top with half meat mixture, then sprinkle with half the cheddar cheese.  Repeat with noddles, meat, then add final layer of cheese.  Bake 20 minutes or until cheese is melted.

Serve & Enjoy!


What a hoot

This is the newest addition to my kitchen and I adore him! I've become a little obsessed with owls right now, they seem to be all the rage.  He's really a flower pot that I found for 50% off at Hobby Lobby-do you have one of these lovely stores near you? I hope so, or if you're married your husband hopes not! I could spend all day and all my money in that store.  Anyway, I found this owl pot there about a month ago and fell in love.  As soon as I spotted him I just knew he would be too cute sitting on my counter top holding all my utensils :) Anyway, I just thought I would share him with you and I wondered if you  had any favorite utensil holders or any kitchen items you love?

Pork Tenderloin

I'm so glad it's finally the weekend! How about you?  This work week felt like it would NEVER end, but Friday made it's appearance and I'm over joyed!  Tomorrow is the first day that our local farmers market opens at its outdoor venue! However, the weather man is calling for rain :( I'm hoping it will hold out long enough for me to get down there and buy some goodies.  I will be sure to post my finds.

Anyway, to the pork tenderloin.  I tend to make this two to three times a month.-It's cheap, fast, easy, and so yummy! My husband enjoys it, so that's a plus too.  You can purchase a package (includes two tenderloins) for about $12.00! If you're feeding two, that is two cheap-o meals.  I usually bring it home from the grocery, open the package, and freeze one for later.

 I don't have a specific recipe, but this is how I usually cook it.  You can really use whatever suites your fancy :)


 Pork Tenderloin
Printable Recipe

Ingredients:

pork tenderloin
olive oil
2-3 tbsp Weber steak 'n chop seasoning (or any seasoning you choose)*
2 tbsp ground coriander


Directions:

Preheat outdoor grill or grill pan to medium high heat. 

Prepare pork tenderloin by removing the silverskin and adding your choice of seasonings.  Make sure to rub the seasoning into the pork (get those hands dirty) and drizzle with a little extra virgin olive oil.
Grill pork on all sides, turning about every 10 minutes (this will depend on your grill or pan temp) until done. Instant read thermometer reads 170 degrees F
Let pork rest 5 minutes before slicing to allow the juices to redistribute.

Serve and enjoy

*I normally just use my grocery store's brand of all purpose seasoning but the Weber seasoning caught my eye while at Sam's Club so I tried it. LOVED IT! 
You can use what ever seasonings you like to rub on your pork, this is just what I have found that my family enjoys the most so I stick with it.  You could also do this in the oven if you prefer.  I normally cook mine on 375 degrees F for about 45-60 minutes. 

Wednesday, April 6, 2011

Shaved Burssels Sprout Salad with Pinapple Poppy Seed Vinaigrette

I crave salad! Once we get one semi-warm day here in Kentucky my mind thinks summer is just around the corner and my tummy starts rumbling for all the goodies of spring & summer: salad, fresh veggies, & fruits. Oh, and fresh cut grass & flowers, but that isn't really relevant to this salad.
Anyway, this salad was pretty darn good.  However, I think next time I will sub the Brussels sprouts for lettuce.  It's odd really, I love all things green (beans, lettuce, spinach, broccoli, etc) but I didn't LOVE these sprouts.  I hadn't had Brussels sprouts since I was little and I think I would like them cooked but these didn't rock my world.  Also, I used frozen instead of fresh because the fresh ones didn't look too hot in my grocery-this could have been a factor as well.  Nonetheless, this was still a great, refreshing meal.

The pineapple poppy seed vinaigrette absolutely rocked my socks off! WOW!!!! It was so amazing and I am so glad that I made extra so I can dip my toasted bread in it and douse some lettuce with it as well :) YUM 

Shaved Brussels Sprout Salad with Pineapple Poppy Seed Vinaigrette 

Printable Recipe 

Adapted from Joy the Baker

Ingredients:

8 cups raw Brussels sprouts, lay sprouts on side and slice thin, creating little green ribbons  (fresh instead of frozen preferred)
1/2 cup scallions, sliced (both white and green parts)
1/4 cup parsley, chopped
2 cups fresh pineapple (I used canned), sliced into bit-size pieces
1 cup black beans (original recipe calls for French Lentils)
1 cup avocado chunks

Prepare all salad ingredients but do not toss together until ready to serve & top with dressing


Pineapple Poppy Seed Vinaigrette
(makes 2 cups)

1 1/2 to 2 cups pineapple chunks
1/4 cup honey
1/4 cup rice wine vinegar
1 tbsp chopped scallions (white portions)
1 small garlic clove, minced (or use hand-held cheese grater to make paste)
1 tsp Dijon mustard
1/2 cup plus 2 tbsp canola oil
2 tsp poppy seeds
salt & pepper to taste

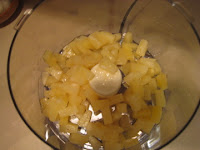
Place pineapple chunks in a food processor fitted with blade attachment.  Blend the pineapple into a mostly smooth, frothy pulp.  Using a fine mesh strainer placed over a bowl, press the pineapple puree through the strainer into the bowl.  Scrape the bottom of the strainer to make sure you get all the juice possible.  There will be a little bit of pineapple in the strainer when you're done.  You should have about 1 to 1 1/2 cups of juice/pulp.

In the food processor, combine juice, honey, rice wine vinegar, scallions, garlic, and mustard.  Pulse 5 times to incorporate.  With processor on, stream in canola oil, stop once emulsified.  Pour the dressing into medium bowl and stir in poppy seeds, salt and pepper to taste.

Toss dressing with salad and enjoy!

Store dressing in airtight container in refrigerator up to one week.

*I only used about 1/3 of salad ingredients since I was making it to serve two people.  I did make all the dressing so I could have left overs for another salad :)

My blog is almost 1 month old, please keep watch for an upcoming giveaway! Hoping you all have a blessed week!

Tuesday, April 5, 2011

A Peek into my Fridge

I don't know about you but I always wonder what other people's kitchens look like. Where do you prepare and cook your food, is your pantry and fridge organized and what do you keep stocked?  So, just in case you are curious like myself, I thought I would post a few pictures of the inside of my freezer and fridge. This is what it usually looks like.....

my freezer
Top Shelf
There is my puff pastry, chicken breasts, buffalo chicken patties, sea scallops, steak, & pork tenderloin
 
Middle Shelf
Chicken breast, hash browns, broccoli, cool whip, pizza dough, and my husband's ice pack for his lunch box :)
Lower Shelf
 Rolls, chicken chimichangas, cheese sticks, Popsicles (from when i was sick), phillo dough

Door
Walnuts, more rolls, fruit for cobblers and smoothies :)
Frigde door & Greta
Butter, mayo, goat cheese, parmesan cheese, & Gruyere (you can't see them, they're hiding) ketchup, mustard, other sauces, heavy cream, buttermilk, chocolate syrup, & wine
The Rest
Milk, OJ, cheese, jam, eggs (lots of eggs), water, left over pizza sauce, yummy pineapple poppy seed vinaigrette (I'll be posting that recipe soon) dressing, cokes, left over pizza, lemons, & some other junk ;)

*Apparently when I posted this I had a major brain-lapse because instead of fridge, I put frig. Not once, but about five times! HAHA, wow! Maybe I shouldn't write posts at midnight ;)
Kentucky Food Bloggers
Foodbuzz

Search This Blog

 
Designed by Munchkin Land Designs. Copyright 2011. All Rights Reserved.