Tuesday, May 31, 2011

The Winners Are.....

Thanks to everyone for entering my cookbook giveaway!

I used a random number generator online to pick the two winners and they are....

Mary Brooks:  
            "My favorite cookbook is the BH&G Cookbook. It has all the basics that I need and the tips      that help me cook good things!" 
Angela Stephens:
              " My favorite is a cookbook i got at Cracker Barrel about 8 or 9 yrs ago called "America's Favorite Bake Sale" :)
It has amazing pictures (always a sell for me) and has easy recipes for desserts, broken down into breads, cakes, pies, cookies, candy, etc...
I think it is one of the first cookbooks that I bought for myself in college and I have used it many times! :)  "


Please e-mail me at: meagansfirstkitchen@gmail.com with your mailing information so I can get your cookbooks to you!


I hope everyone had a great Memorial Day weekend and I can't wait to update you on my kitchen progress.  I haven't been cooking the last few days because all the contents of my kitchen are currently in my extra bedroom since we are no in the painting process.  I will try to post some pictures later this week! 


Thursday, May 26, 2011

Cookbook Giveaway!


It's time for another giveaway!


I pre-ordered this cookbook, In the Small Kitchen (Cara Eisenpress & Phoebe Lapine) months ago and it was patiently waiting for me when I got home from work today! What a great surprise.  I opened it up and read through the entire cookbook.  This cookbook is too cute and I cannot wait to get in my kitchen and make some of these recipes.  

One reason I love this book is because the authors are my age and make amazing creations in their TINY New York kitchens-if they can do it, so can I and so can YOU!  This book isn't just about cooking though, Cara and Phoebe (aka The Quarter Life Cooks) also include funny stories about their recipes and their lives. 

This book is also arranged by occasions for cooking; there are sections including:
                 Cooking for One
                 Potlucking
                 Cocktail Parties
                 Dating & Food
                 Brunch
                 Giving
                 The Dinner Party
                 Leftovers

How great is that? I find this way of organizing a cookbook super cool and helpful! If you're home alone and just cooking for yourself, if you need something transportable for a picnic, or something to take to a cocktail party, etc. Also, they have included a section called prep school which gives you instructions on basic cooking: browning meat, mashing potatoes, etc.  They have also included a section of recommended cooking supplies and pantry essentials to get you started without being overwhelmed. 

Anyway, since I am loving this book and think you will too, I'm giving away 2 copies! Yup, TWO copies! All you have to do is leave me a comment on this post answering the question:

What's your favorite cookbook? 

 (If you don't have a favorite, then just tell me if there is a cookbook you want)

For extra entries:
Become a follower of my blog (if you already follow, just let me know that)
Post this giveaway on your blog or facebook page

Make sure to leave a separate comment for each entry!!! 

Giveaway ends Tuesday, May 31st at 10:00 pm!  
Winner will be chosen (by random number generator) and announced Tuesday evening. Please e-mail me to claim your prize no later than Thursday, June 2nd!  


GOOD LUCK!

Turkey Burgers


I bought some ground turkey last week because it was a managers special. I cannot remember exactly, but I think it was $0.50/lb-something super-duper cheap! I have used ground turkey only once; making a lasagna.  I figured turkey burgers would be an easy thing to make and since I didn't have a recipe (or so I thought) I would just make them the same way I do my hamburgers. When making hamburgers I just add some S&P and Worcestershire sauce to the ground chuck and throw 'em on the grill.  After looking through my Simply Suppers cookbook I realized there was a Turkey Burger recipe so I thought I'd give that a go.  Of course, I had to make a few changes due to what ingredients I did and did not have on hand.  I'm proud of myself for resisting the temptation to run to the store and buy the 2 ingredients I didn't have on hand.  :)

Greta hanging in the yard while Steve grilled the burgers :)

Turkey Burgers
 Adapted from Simply Suppers
Printable Recipe

Ingredients:

1/4 cup panko bread crumbs
1 tbsp. milk
1 lb ground turkey
1/2 cup grated sharp cheddar cheese (original recipe calls for sharp white cheddar)
3 tbsp. Dijon mustard
Kosher salt & freshly ground black pepper
hamburger buns

*1 lb. ground turkey makes 4 burgers*
*Original recipe also included 1/4 cup thinly sliced scallions which would be mixed in with turkey mixture before grilling).

Directions:

Preheat grill or grill pan**

In a large mixing bowl combine panko bread crumbs & milk until milk is absorbed.  Add the ground turkey, cheddar cheese, & Dijon mustard.  Season with s&p to taste.  Gently mix together by hand until well combined.

Divide and form 4 patties.


Grill burgers until there is no pink, about 6-8 minutes per side.

During the last few minutes add a slice of cheese if desired

Let rest 5 minutes before serving!

To serve, lightly toast buns on grill then place turkey burger in between the bun & garnish as desired.  ENJOY!

**Original recipe says to preheat oven 395 degrees F and after browning both sides of turkey burger, place in oven 8-10 minutes or until burgers are no longer pink in the middle. I did my burgers on the grill the entire time.

Monday, May 23, 2011

Grocery Budget Cut

I mentioned before that I am trying to cut down the costs of groceries because I really spend too much money while only feeding two people!  I have become addicted to the TLC show "Extreme Couponing" - I also made the mistake of asking Steve to watch it with me; now he thinks I definitely spend too much money on groceries and we should be able to eat on $10.00 a week or something.  Okay, that is an over exaggeration but you get the point.

I have started to cut coupons and have already seen some savings (I only cut coupons for items I already use).  I am not trying to spend $5.00 on $500.00 worth of groceries like those people on the T.V. show nor do I want to stock up on items that I don't already use.  However, the next step in my process is to cut our budget in half.  I currently spent about $100.00 a week at Kroger (the grocery store I use) and I am going to cut it back to $50.00.  Some of you may read this and think WOW, how do you spend $100.00 on just two people while others may feel that $50.00 is too little.  The latter is how I felt until I stopped by Money Saving Mom. The author of this amazing blog is Crystal and she has started a weekly video series to help beginners like myself get started on saving money.   Her series called 31 weeks To a Better Grocery Budget.  The first week she covers attitude! I thought to myself "how in the world is attitude going to save me money at the store?" Well, she's completely right! If you think you can't do it then you can't and if you keep making excuses (like I have been) then you won't try and again you won't succeed.  Crystal suggests your budget (starting off) should be $20.00 per person per week. I am adding an extra $10.00 to that to make it $50.00!  If you are wanting to cut down costs on groceries you need to check out her blog! I am loving the video series and I am excited for the next lesson this week. 

I'm sure this will be a long process since I'm just getting started but I will make sure to keep ya' updated as I succeed or fail at my mission to cut our grocery budget.  Today, I'm actually making a grocery list and I'm going to the bank to get out the cash for June's grocery budget.  One thing Crystal recommends is to get out the monthly money for your groceries and put it in an envelope.  This way you have a little freedom if you need to go over budget one week.  Since it's not June yet I'm trying to spend less than $50.00 this week because after adding up what I've already spent this month it's way over my new budget but I still need a few items (milk, bread, lemons, etc) that  I simply cannot go without for another week. 

If any of you are "extreme couponers" or have any money saving tips I would LOVE to hear them!

Friday, May 20, 2011

Corn Chowder

I won the Simply Suppers cookbook over at What Megan's Making and couldn't wait to try a new recipe.  I decided on the Corn Chowder because Kentucky is going through some winterish weather here in the middle of May! I don't know what's going on but for almost a week it's been in the 50's! The week before I think it had been in the 80's! CRAZY!  Anyway, this cold weather put me in the mood for some warm comfort food and when I saw this recipe in my new cookbook I knew it had to be made.

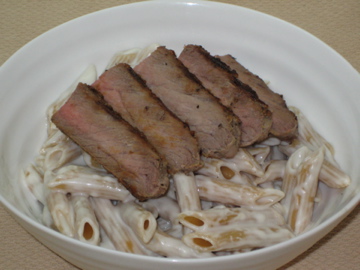
I cannot tell you enough that I adore easy yet hardy meals during the week.  I just don't have the energy to come home and cook up some elaborate meal after working.  I know some of you MUST feel the same, right? I'm not alone here am I?


I did make a few modifications from the original recipe-depending on what I already had on hand.  I'm really trying to use up what I've got in the pantry before buying unnecessary ingredients that could really be substituted.  I used 2 cups less chicken stock because I just had one box (4 cups) and I NEVER have half & half I either use milk or heavy cream and for this soup heavy cream is where it's at, let me just tell ya! I do NOT cook low-fat, ultra-healthy food :) Well, at least not usually.  I also used less onion because my husband doesn't really like onion and can you believe it said cheese and bacon were OPTIONAL!? REALLY? I don't know anyone who would consider those two ingredients optional. I'm thinking about writing to the editor about this typo, they must have meant to put NOT OPTIONAL! Maybe it's just a southern thing? You tell me. 

Anyway, this corn chowder is AMAZING if I do say so myself! Steve really enjoyed it as well and I took the left overs to my mom whose currently under the weather. I predict after eating this she will be feeling 100% better! ;)

Corn Chowder

Adapted from: Simply Suppers

Printable Recipe

Ingredients:

2 tbsp unsalted butter
1 tbsp olive oil
1/2 cup finely diced yellow onion
2 garlic cloves, minced
1/2 tsp dried thyme
1/4 cup all-purpose flour
6 cups chicken stock (I used 4)
4 cups peeled and diced white boiling potatoes (about 4 large potatoes)
2 cups heavy cream*
4 cups corn kernels (2 lbs frozen or 8 ears fresh)
Kosher salt and freshly ground black pepper
1/2 cup shredded cheddar cheese**
1/4 cup crumbled cooked bacon***

* Original recipe called for half & half, I DO NOT use half & half I'm a heavy cream gal :)
** Original recipe said cheese and bacon were optional, Not in my kitchen!
***I didn't have bacon so I just used Crumbled Bacon from bag (Hormel brand)

Directions:

In a large stockpot (I use cast-iron dutch oven) over medium-high heat, warm the butter & oil until a few droplets of water sizzle when carefully sprinkled in the pot. 

Add the onion, garlic, and thyme and cook, stirring occasionally, until soft, about 4 minutes.

Dust the onion mixture with flour and stir to coat.  Cook for 2 minutes.

Whisk in chicken stock and over high heat, bring to a boil.

Add the potatoes and bring mixture back to a boil. 

Stir in heavy cream (or half & half).

Reduce heat to medium and simmer uncovered for 15 minutes or until potatoes are tender.

Add corn and simmer until corn is soft, about 15 minutes. 

Season with LOTS of salt & pepper to taste. Serve hot, with cheddar cheese and bacon :) ENJOY!

Wednesday, May 18, 2011

Knock You Naked Brownies


I have already made these brownies TWICE (I forgot to take a picture the first time, they actually looked better) and they are sooooo amazing, I'm sure I will be making them again next week :) They are super simple and so delicious.  Honestly, I could eat the whole pan myself; to my defense the pan is only an 8x8 :) HEHEHE (note the evil laugh).


It's really crazy how good these are because it's truly one of the easiest desserts I've made.  Funny that some of the best desserts I make (the ones my friends and family members request and ask for the recipes) are the easiest to make! Actually, in all honesty...those are the recipes I don't want to share because everyone just assumes that they are complicated because they are so good and are less impressed when I tell them how few ingredients and how simple they are :) Kidding, I LOVE sharing all tasty recipes and love it more when they are easy because it inspires those who say they "can't cook" to get in the kitchen! 


I only made two changes to the original recipe- omitted the nuts (too many of my friends don't like them so I just left them out) and instead of caramel candies I used caramel ice cream topping.  If you have a summer outing: a picnic, work pot-luck, birthday party, you need to make these and everyone will adore you! TRUST ME! Also, the first time I made these I didn't have German Chocolate cake mix and although it specifically said NOT to use Devil's Food, I DID! Guess what...still amazing! Actually, I think I liked them a little better with the Devil's Food but that's just me. 


Knock You Naked Brownies

Source: The Pioneer Woman

Printable Recipe 


Ingredients:

1 box German Chocolate Cake Mix (I've used Devil's Food as well)
1/3 cup Evaporated Milk
1/2 cup Evaporated Milk (additional)
1/2 cup Butter, Melted (1 stick)
1/2 jar Caramel Topping
1/3 cup Semi-Sweet Chocolate Chips (I use Ghirardelli)
Powdered Sugar for dusting

Directions:

Preheat oven 350 degrees F

In a large bowl, combine cake mix, 1/3 cup evaporated milk, 1/2 cup melted butter.  Mix together until combined, it will be very thick.

Press half the mixture in a 9x9 prepared baking dish (make sure it's greased).  Bake 8-10 minutes, remove pan from oven and set aside.


In a small sauce pan, over medium-low heat combine 1/2 cup evaporated milk and 1/2 jar caramel sauce. Stir until mixture is combined, then pour over brownie and layer with chocolate chips.


Make an 8x8 square with remaining brownie mixture on wax paper and place in freezer 5 minutes (this makes it easier to handle). Place on top of first brownie layer (brownie side down) and peal off wax paper.

Bake 20-25 minutes, remove pan from oven and allow pan to cool to room temperature.  Cover and place in refrigerator for a few hours. 

When ready to serve, dust with powder sugar and ENJOY!
Even I wanted a glass of milk with these (I hate milk)

Sunday, May 15, 2011

Kitchen In Progress

Since we moved into our home almost two years ago we haven't done much to the kitchen aside from some  paint, changed the light fixture (it was a rectangle fluorescent heinous thing) and changing the golden knobs to brushed nickel ones. The kitchen is my favorite room of the house so I really wanted it to be nice and semi-stylish. This is often hard when you are on a small budget but I am excited for a little change. 

After looking at many home decor magazines and getting some inspiration from this picture from The Lettered Cottage (love this blog by the way) my husband agreed that we could paint our cabinets!  I should note that Steve is AMAZING with doing home projects and is so helpful when it comes to doing any carpentry work (or really any "man job"): he built me a book shelf when we were dating, built my garden bed, and did an amazing job on my kitchen bookcase.  Not to mention all the other small things he's had to do around the house and our yard looks amazing thanks to his hard labor! Since I am not as handy as he is and I'm not a perfectionist like he is this project would not be possible without his help him doing all the work!
can't see the detail but that's what a camera phone does for ya :)
One thing I loved about our home when we were first buying was the kitchen.  It's much larger than any of the other places we looked at and although I didn't love the cabinets it was a small sacrifice for the space. 

I will try to post updates as we go along in this small "remodel".  Not really sure I would even called it that since we are just adding some paint, removing two doors, adding trim and changing the pull knobs. 

Here is what my kitchen looked like when we first moved in:
This was actually taken before we bought the house 

My mother and mother-in-law helped paint our entire house before we moved in!  This was quite the project considering our living room was SEMI-GLOSS GOLD with a maroon tray ceiling! And yes, it was much worse than it sounds! Our bedroom & Steve's bath were a dark brown & my mom had to re-paint my bathroom last summer after I attempted to have fun with color. It looked like you were "peeing in the ocean" as one of Steve's friends put it :)  This year when we went on vacation my dear sweet mother re-painted our kitchen "barley" because I felt the neutral tan color we originally used was just too boring! I find it hard to pick between what is boring and what it just tacky! HAHA.

Currently
You can't tell from the first picture before we moved in but those can lights were not there. Another project my amazing husband and step-dad added for me :) 

I forgot to take a picture of the other side before taking the doors off but oh well....
Doors off...please disregard the mess, I hadn't cleaned up dinner/dirty dishes

Another thing I loved about our home is behind those folding doors you see in the above picture: THE PANTRY! Although mine isn't fancy it's fairly large. Again, you have to keep in mind we have a small home and none of the other homes we looked at even had one! We aren't changing anything in the pantry (at least not yet) here is a picture:
taken from inside our garage, you still can't see it all but it's as good as it gets
Wish us Steve Luck :)

Friday, May 13, 2011

Creamy Steak Pasta

Sorry I have been MIA for awhile.  This past week was pretty hectic and I didn't do much cooking; at least not anything worth posting or talking about. Sometimes I just have those weeks when although I love cooking I just don't really feel like it. I get home from work and there are so many other things that need to be done and I'm already tired that cooking dinner just seems like a mountain I can't climb. Do you ever feel that way?

I have actually made this dinner several times before but I normally use chicken.  Well, after searching in the freezer I had one New York Strip steak left (I hate how so many large packages of meats come in odd numbers, MAJOR PET PEEVE of mine).  I decided I would toss the steak on the top of this easy creamy pasta and it was a success! How could it not be? STEAK, PASTA, CHEESE (lots of yummy cheese). That's a good trinity if you ask me!


Creamy Steak Pasta 

Printable Recipe 

Ingredients:

8 oz. steak (I used strip)
2 cups penne pasta (I used whole wheat)
2 tbsp butter
1 tbsp flour
1 1/2 cup milk
4 oz. cream cheese
1/2-3/4 cup Pecorino Romano cheese (grated)

Directions:

Heat grill pan and season steak as desired (I like Weber Steak 'N Chop seasoning)

Cook steak 8-12 minutes per side (depending on how well or rare you want your meat)   
Meanwhile, cook pasta per box directions (Don't forget to salt your boiling water prior to adding the pasta)

Melt butter in medium sauce pan.  Stir in flour until blended well.

Gradually stir in milk, bring to a boil and cook on medium about 2 minutes or until thickened, stirring constantly.
Add cream cheese, grated cheese, and salt & pepper to taste, cook 1-2 minutes or until cheese is completely melted and sauce is blended.

Drain pasta and place in bowl, toss to coat with sauce then add steak  ENJOY :)


*This serves two with some left over pasta*

Thursday, May 5, 2011

Chicken Tacos


My husband LOVES tacos! For awhile we had tacos once a week and then for another while we had taco bake once a week. Well, I have to admit ground beef is just NOT my favorite and after about 6 months of either tacos or taco bake I needed something new. So, when I saw these tacos here I had to make them & they were AMAZING! I actually made these a few weeks ago and now that I'm writing this post I'm craving them now!

My picture doesn't do them justice, especially the corn tortilla shells that were fried to make them just the right amount of crispy! OH MY....SO AMAZING! Have I told you how AMAZING these were? Hehe.

Chicken Tacos
Source: The Pioneer Woman
Printable Recipe 
Ingredients:
  • Corn Tortillas (small Size)
  • 2 whole Boneless, Skinless Chicken Breasts, Cut Into Pieces*
  • Taco Seasoning
  • 2 Tablespoons Canola Oil
  • 1 can (4 Ounce) Diced Green Chilies*
  • 1-½ cup Finely Grated Cheese (cheddar Or Cheddar/jack Mix)
  • Sour Cream
  • Hot Sauce
  • 1 cups Thinly Sliced Romaine Lettuce (or Any Lettuce)*
  • 1 whole Roma Tomatoes, Diced*
  • Canola Oil, For Frying Tacos

*Since I'm only cooking for two I  cut down on a few of the ingredients*

Preparation Instructions

Season diced chicken liberally. Heat 2 tablespoons oil in large skillet over medium-high heat. Add the chicken and cook for a couple of minutes.

Dump in the diced green chilies. Stir and cook until chicken is totally done inside. Turn off heat and set aside.

Get all other ingredients (grated cheese, sliced lettuce, diced tomato, sour cream, and hot sauce) ready.
Also have a plate ready, as well as a stack of five or six paper towels to hold in your hand (this is for frying the tortillas)


TO FRY

To fry the tacos, heat a couple of inches of canola oil in a heavy skillet over medium-high. Place some chicken in the middle of a tortilla, then fold tortilla in half.

Clamp the tortilla shut with a pair of heat-proof metal tongs, then carefully lay the taco—one side down—in the oil. As you lay it in the oil, use the tongs to hold the top side down for a few seconds to form it in place. Once it stays put, repeat with two other tacos.

Turn tacos after 30 to 45 seconds, or when each side gets light golden brown (not too brown.)

One at a time, remove tacos from the pan with tongs, holding sideways as you remove them to allow oil to drip out of the sides. Place the taco in the stack of paper towels. Fold the sides and corners around the taco to tightly hold it, then give it three or four shakes to remove excess oil. Remove it from the paper towels and place on a plate. Repeat with other tacos in the pan.

As you continue frying the other tacos, have someone carefully place some grated cheese inside the tops of the tacos (gently pry them open just enough to place the cheese in). Then just let them sit until ready to serve—the cheese will melt as it sits in the warm taco.

To serve, garnish in this order: a smear of sour cream, dashes of hot sauce, shredded lettuce, diced tomato. You’ll need to slightly open up the tops of the tacos to get all the garnishes in there.

Tacos will be hot for a minute or two after frying, so let them cool slightly so you don't burn your hands :) ENJOY!!!


Monday, May 2, 2011

Garden!

I posted earlier that I was really looking forward to going to our local farmers market.  Well, I still haven't made it there and I didn't hear rave reviews from some friends that did go :( I know most people who live in larger cities say their farmers market have really great produce and it's usually cheaper than a super market, unfortunately that's not the case for ours (at least from what I've been told).

So, I decided to start my own little garden. We are attempting to cut our grocery budget down by half! And when I have looked back at previous visits to the store, a lot of the more expensive items have been produce and herbs, most of the time we don't even use all of what's bought.  Many times, the majority ends up in the garbage can.  This year I'm just starting small: tomatoes, red bell peppers, basil, thyme, & flat leaf parsley.  I really wanted to plant some lettuce and onions but I didn't feel like going to multiple places to buy the plants and I figured if I tried to do too many items I would just end up getting overwhelmed and discouraged.  It's crazy to think I have spent $4.00 (sometimes more) on basil, thyme, & parsley and that's only for 1/2 a handfull! Also, it usually dies before I use it all. You can buy a whole plant for about $3.00!!

I'm really hoping my little garden will flourish and hopefully next year I can expand and really cut costs on produce.  I took a few pictures that I wanted to share (they were taken with an iphone in the rain so you'll have to excuse the blurs). I am going to try to keep taking pictures and update as the plants grow and start producing :) Oh, I ALMOST forgot to mention my husband did all the work: building my raised beds and took good care to plant everything for me but now it's up to me to keep them alive! Hehe.

Sweet Basil

Italian Parsley

Red Bell Peppers

German Thyme

Butter Boy Tomatoes
Do any of you have gardens? If so or if you have any gardening experience I'd love to see them or hear your advice!  I have only grown tomatoes in the past and last year I had some basil and parsley in pots but once they outgrew their pots I gave up on them.  Happy Gardening! 

Lemon Loaf Cake

Can you see that yummy glaze on top?
If you need something refreshing to get your spring started off on the right foot...make lemonade THIS CAKE! I have made this a few times and it's always a hit!  Last week I took it to my Bible Study and the girls really liked it; my coworkers enjoyed the leftovers :) If you adore lemon-flavored goodies like I do then you will love this lemon infused cake (that has a lemon syrup) and a lemon glaze :) I know it sounds like maybe too much lemon, but it isn't.

These pictures have nothing to do with the lemon cake but they got me excited about spring so I thought I would share them with you.
blooms from my cherry tree :)

Loving Spring


love this picnic basket-a gift from Mom
I made this cake the night before and wrapped foil around my tray and it kept nicely this way so that I could easily transport it to Bible Study:


Lemon Loaf Cake 

Source: Willow Bird Baking

Printable Recipe

Yields: one 8-inch loaf

Cake Ingredients:
1 1/2 cups all-purpose flour
2 teaspoons baking powder
1/2 teaspoons kosher salt
1 cup sour cream
1 1/3 cups sugar, divided
3 eggs
2 teaspoons lemon zest
1/2 teaspoons pure vanilla extract
1/2 cup vegetable oil
1/3 cup freshly squeezed lemon juice

Glaze Ingredients:
1 cup confectioners’ sugar
2 tablespoons freshly squeezed lemon juice

Directions:
Preheat the oven to 350 degrees F. Grease an 8 1/2 x 4 1/4 x 2 1/2-inch loaf pan. Line the bottom with parchment paper and butter and flour the entire pan.

Sift the flour, baking powder, and salt together into a medium bowl. In a large bowl, whisk together sour cream, 1 cup of the sugar, eggs, lemon zest, and vanilla. Slowly add the dry ingredients into the wet, whisking to combine (I did this in 2-3 additions). Use a rubber spatula to fold the vegetable oil into the batter until it’s fully incorporated. Pour into the prepared pan and bake for about 50 minutes, or until a cake tester stuck in the center of the loaf comes out clean.

While the cake is baking, combine the 1/3 cup lemon juice and remaining 1/3 cup sugar in a small saucepan over medium heat and cook until the sugar dissolves and the mixture is clear. Set aside.

When the cake is done, allow it to cool in the pan for 10 minutes before removing it and placing it on a baking rack over a sheet pan. Use a cake tester, or toothpick to carefully pierce holes throughout the cake While the cake is still warm, pour the lemon-sugar mixture over the cake and allow it to soak in. Cool completely.   

In a small bowl, combine the confectioners’ sugar and lemon juice, whisking to form a smooth glaze. Pour over the cake. 
Kentucky Food Bloggers
Foodbuzz

Search This Blog

 
Designed by Munchkin Land Designs. Copyright 2011. All Rights Reserved.