Showing posts with label Main Dish. Show all posts

Sunday, February 5, 2012

The BEST Grilled Chicken Tacos

My husband loves tacos. In fact, during our first year of marriage we had tacos or taco bake (perhaps I'll share that recipe one day) once a week.   Starting our second year of marriage I vetoed that request and we've had tacos/taco bake maybe three times. I'm not a huge ground beef gal, so tacos are definitely not a favorite of mine. I got completely burned out on taco bake and could honestly go the rest of my life without having it again. However, when I saw this recipe a light bulb went off. This was a great way to make the hubs happy, since it's tacos and ME happy, since it's chicken!

If you look at the recipe below it may seem a little over-whelming. There seems to be a lot of ingredients and a lot of work but it's really not. Although there are a lot of ingredients I had everything on hand except the chicken thighs. The only thing I changed from the original recipe was that I left out the cilantro because we aren't big fans.  I also didn't grill the pablano pepper for the sweet corn salsa. 

Grilled Chicken Tacos

Ingredients:

For the Chicken:
2 lbs. boneless, skinless Chicken Thighs
2-3 cloves of Garlic, grated
1 teaspoon Chile Pepper
1 teaspoon Cumin
1/2 teaspoon Cayenne Pepper
1/2 teaspoon Cinnamon
1 teaspoon Kosher Salt
1/2 teaspoon Fresh Cracked Pepper
1 cup Beer, any kind
2 tablespoons Sesame Seed Oil
Juice of half a lime

For the Sweet Corn Salsa:
2 Cups Corn {fresh or frozen}
1 Poblano Pepper, seeded and diced small
1 Jalapeno, seeded and diced small
3 tablespoons Red Onion, diced small
1/2 a Lime, juiced
1/2 a teaspoon Sugar
Kosher Salt, to taste
1 tablespoon olive oil

For the Garlic Habanero Sour Cream:
 
2 Garlic cloves, grated
2 Habanero Peppers, seeded and diced small
1/2 cup of Sour Cream
1/2 tablespoon Olive Oil
Kosher Salt and Fresh Cracked Black Pepper, to taste


Directions:

For the Chicken:

Combine the garlic, spices, sesame seed oil, beer and lime juice in a medium sized bowl.

Place chicken thighs in a re-sealable bag, pour the marinade over top and toss to coat. Seal the bag and place in refrigerator for 2 hours.


Preheat grill or grill-pan to medium-high heat then place chicken on grill.

Cook 4-6 minutes on each side or until chicken is cooked through then remove and set aside.

Allow chicken to rest a few minutes then slice chicken into bite-size pieces.


For the Sweet Corn Salsa:

In a large bowl combine all ingredients and toss together.

Place plastic wrap over bowl and keep in refrigerator until ready to use.


For the Garlic Habanero Sour Cream:

In a small skillet over medium heat, heat olive oil and add garlic and Habanero peppers and saute about 2 minutes.

Remove from heat and place in a food processor with sour cream and salt and pepper.

Blend together until combined well.  Store in an air-tight container in the refrigerator until ready to use.


Assemble tacos on flour tortillas as desired and enjoy!
I'm telling you, these are AHHHHHH-MAZING! I loved them, the hubs loved them; this recipe was a winner and one I will be making more often!!!!

Thursday, January 19, 2012

Sweet & Sour Chicken

I've made this sweet and sour chicken several times; it's my favorite.  Steve and I love Chinese food but we don't like to spend the money on take out. Don't misunderstand and think we never order in, we do but we've really been trying to scale back.  I like to make a side of rice (brown or white depending on my mood) and it's honestly just as good as take-out.
It's much cheaper than ordering from a Chinese restaurant and it's really easy which is always a plus! I'm ashamed to say I've purchased several different sweet and sour sauces at the grocery in the past but I never liked any of them. This homemade version taste great, is easy, and again it's super cheap. You probably already have all the ingredients you need. If you don't have rice vinegar you can use white vinegar instead.
Sweet & Sour Chicken
Source: Brown Eyed Baker
Printable Recipe

Sweet & Sour Chicken

Yield: 4 Servings

Ingredients:

For the Chicken:
3-4 boneless,skinless chicken breasts, cut into bite-size pieces
Salt and pepper, to taste
1 cup cornstarch
2 eggs, slightly beaten
¼ cup canola oil

For Sauce:
¾ cup sugar
4 tablespoons ketchup
½ cup rice vinegar
1 tablespoon low-sodium soy sauce
1 teaspoon garlic powder

Directions:

Preheat oven to 325 degrees F.

Season chicken with salt and pepper.

Working in batches, toss the chicken in cornstarch and then coat with the egg.

Heat the oil over medium-high heat and again in batches, brown the chicken on all sides.

Place the chicken in a single layer in a baking dish.

Whisk together the sauce ingredients in a small bowl and pour over the chicken, toss to coat.

Bake for 1 hour, turning the chicken every 15 minutes.

*I like to make two batches of sauce so I can dip my chicken. I put my second batch in a small sauce pan and heat on low for a few minutes before serving.

Monday, November 21, 2011

BBQ Pulled Pork

I hate washing dirty dishes and cleaning up the kitchen. In fact, on some of those cookless nights it's because of the dirty dishes that I choose not to cook. :) That's just how I roll. I'm not one of those people who can leave dirty dishes in the sink over night, leave for work in the morning, come home, cook and dirty more dishes then clean them. No, that's just not my style. If you know my mamma then you know where I get this from.
I won't say I have NEVER left dirty dishes. You might find my morning coffee cup (my favorite one that can't go in the dishwasher) in the sink if you came over to my house while I'm at work. And sometimes I let a dish soak over night and usually finish up the clean in the morning.  If you find more than 1 dirty item in my sink then you know I'm either sick or I've been committed.

My least favorite item to wash...my beloved crock pot.  While I adore cooking with it, you simply place your food in the crock and turn the knob to low and let it do it's thing all day and like magic you have dinner! But cleaning the darn thing STINKS! My crock is black and if you put it in the dishwasher you get a white residue left over from the detergent...UGH! This drives me NUTS!!!! I can't tell you how many times I clean my crock pot with each use, at least an average of 3 times per use!

All that complaining aside, I'll continue using my crock pot and loving the food it produces, this BBQ pulled pork included!


BBQ Pulled Pork
Printable Recipe

Ingredients:

1 pork shoulder (Boston Butt)
2 bottles BBQ sauce (I use Sweet Baby Ray's)
4 tbsp. Weber's Steak 'N Chop seasoning
2 cups water

Directions:

Place pork shoulder in crock pot along with Weber's seasoning or seasoning of your choice.

Add 2 cups water and cook on low 10-12 hours.

Remove pork from crock pot and pull apart with forks.

Pour out the cooking liquid that's left in the crock pot and return pulled pork to crock.

Add 1-1 1/2 bottles of your favorite BBQ sauce.

Serve on bread as a sandwich and add some mozzarella cheese if desired.

Monday, November 14, 2011

Butternut Squash Lasagna with Spinach & Sage


I'm an odd-ball- this I already know, you need not remind me.  I do weird things, especially when it comes to cooking.  For instances, I either measure all ingredients exactly as the recipe suggests (using a kitchen scale for things such as flour, sugar, etc.) Or, I disregard measurements completely. Do you do silly things like this?  Usually, if I'm baking a dessert (for the first time) I tend to measure things exactly, well the "important things". You'll rarely find me measuring spices and I NEVER EVER EVER measure salt and pepper...OOPS! When it comes to savory/non-dessert baking dishes, I usually don't measure things at all.  So far, this has worked out for me and this recipe is a prime example. Unfortunately, the picture does not do this lasagna justice, it was great.

When I first saw this recipe I was intrigued but skeptical.  Luckily, my curiosity got the best of me and I made it almost immediately.  It was really tasty and the Parmesan-Sage Bechamel sauce will be used in many other recipes.  I love finding recipes that you can use parts of in other dishes.  I think the sauce would be yummy with penne pasta and grilled chicken :)  If I can make a suggestion when it comes to cooking, it would be this:  Step out of your comfort zone, take some chances, and explore things you normally wouldn't.  You might be pleasantly surprised.


Butternut Squash Lasagna with Spinach & Sage
Printable Recipe
Source: Bake Your Day
Ingredients:

Roasted Squash
1 (2-3 lb) butternut squash, peeled and diced into 1-inch cubes
1 tbsp. olive oil
1 tbsp. fresh sage leaves, chopped (or 1 tbsp. dried sage)
1/2 tsp. salt
1/2 tsp. pepper

Parmesan-Sage Bechamel Sauce:
2 tbsp. butter
1/3 cup all-purpose flour
1/4 tsp. salt
1/4 tsp. pepper
14 tsp. ground nutmeg
1/2 tsp. dried sage
3 cups milk
1/2 cup Parmesan cheese

Lasagna:
1 large onion (I used purple), diced
2 tbsp. olive oil
1/4 tsp. salt
10 oz. package frozen spinach, thawed and drained
12 lasagna noodles
1-2 cups shredded mozzarella cheese

Directions:

Preheat oven to 375 degrees F.

Spray a roasting pan with non-stick spray and add butternut squash, then toss with olive oil, sage, salt and pepper.  Roast 25-30 minutes, until squash is tender.

Remove from oven and transfer squash to a bowl, then gently mash with potato masher.

While squash is roasting, melt butter over medium heat in a medium sauce pan then gently stir in flour and whisk.

Add salt and pepper, nutmeg and dried sage and continue to cook for 1 minute, stirring constantly.

Slowly whisk in milk and cook over medium-high heat, stirring frequently.  Cook until sauce boils and thickens slightly.

Whisk in Parmesan cheese then remove from heat.

Heat 2 tbsp. olive oil in a large pan or dutch oven then add onion.  Cover and cook onions 20 minutes or until they are brown and fragrant, stirring frequently. 

Add spinach to onions and cook 6-8 minutes then add the butternut squash and stir until combined.  Remove from heat.

Spray a 9x13 or 9x9 baking dish with non-stick spray.  Ladle a small amount of the Parmesan Bechamel sauce on the bottom of pan then layer 4 (3 if using square dish) lasagna noodles on top of sauce. It is okay i the noodles overlap.  Next add the squash/spinach mixture then top with about 1 cup sauce, repeat layers 2 (4 if using square dish) times.

Add 2-3 cups mozzarella cheese on top of lasagna and sprinkle some Parmesan on top if desired.

If you want to make ahead, cover with foil and keep in refrigerator until ready to cook.

Preheat oven to 450 degrees F and cook lasagna, covered for 30 minutes.  Remove foil and cook another 15 minutes, uncovered.  Remove lasagna from oven and allow to sit 10 minutes before serving.

*I did not measure any spices, I just added them to taste, the above measurements are from the original recipe but I think mine were fairly close.  My grocery didn't have fresh sage so I used dried while roasting squash and in the sauce.*

Monday, October 31, 2011

Dog Cheating & Creamy Chicken Casserole

Greta is driving me nuts!  She has been jumping and sniffing on me since I walked in the door.  Why? Because I spent the last few hours "cheating on her".  Well, at least that's how she makes me feel when I've been around another dog.  She met me at the door, waggin' her nub of tail, like always.  Almost immediately she gets this odd look in her eyes; a sad, depressed kind of look.  Then the sniffing and jumping craze starts, almost like she's questioning me: "Where have you been? Who have you been with? Who were you petting, is she cuter than me?"

Some friends of ours had a baby a few weeks ago-Hudson.  I took them dinner Friday evening and spent a few hours holding the baby, eating dinner, and talking.  They have a dog, Sadie.  She's a total cutie and Greta smelled her the second I walked in the door.  She doesn't take kindly to me walking in with another dog's scent.  I can't blame her.  Although Sadie is super cute, she's not as sweet and pretty as my baby and neither hold a candle to baby Hudson.  He was just the sweetest little thing! Check out Lauren's blog to see her bundle of joy.
 
I took my friends this chicken casserole, along with mashed potatoes, corn, and chocolate chip cookies. I've made this chicken casserole several times and it's great.  Not only is it tasty, it travels well and is great the next day.  I really enjoy cooking for myself and my husband but nothing gives me more pleasure than cooking for others.  It's so rewarding to take someone food and have them not just appreciate the dinner but truly enjoy the food.  That being said, there is nothing more sad than having your puppy child look at you with disappointed eyes because you came home from loving on another canine. 

Creamy Chicken Casserole
Printable Recipe 
 
Ingredients:

4 or 5 chicken breast
2 cans cream of chicken soup
1 can milk*
1 stick butter, melted
1 package Stove top dressing (chicken)
1 can chicken broth

Directions:

Cook chicken breast in crockpot with 1 can broth, salt, pepper, and a little butter on low for 6-7 hours.

Preheat oven to 350 degrees F.

Place chicken in a 9x13 casserole/baking dish and shred with fork. 

Mix the broth from crockpot with a stick of melted butter, set aside.

Mix soup and milk (measure milk in one of the cream of chicken soup cans) and pour over chicken.

Top with dry dressing then pour broth/butter mixture on top.

Bake casserole, uncovered for 45 minutes or until top is golden brown.


I hope ya'll have a blessed week :)

Wednesday, October 12, 2011

White Chili on a Bad Day


Sunday evening I decided I would take our water bill and drop it off downtown.  First off, if you know where I live you're laughing because "downtown" is not really what most consider downtown.  Anyway, it's about 9:45 PM, I hit the garage door opener and put my car in reverse.

BAM! 

I backed my car into my husband's truck.  Yup, that new car I just got in March. Yes, the one my husband won't allow me to take to the car wash because he worries about scratches.  Busted my bumper so now I get to spend all day Friday taking it to have an estimate and probably crying when I see what that's going to cost. :( The worst part: Steve didn't get mad or yell at me! For some reason, that's made me feel worse than the fact that I backed my car into his! Geez!

So, what does one do when you've had a bad day? Make chili of course! I woke up Monday morning and got out my crockpot and decided the rest of my week would be good. I wasn't too encouraged when I tripped walking into work and almost face planted :) It's just been one of those weeks for me.

However, white chili is always comforting and this is one of my favorite fall dishes.  It's so tasty and easy.  I'm sure by now you know that "easy" meals are a common theme around my kitchen.  Since I work a full time job and my husband doesn't get off at the same time every night it's not always doable to make a big fancy, time-consuming meal.  I'm tellin' ya, the crockpot is a working woman/man's best friend!
The first time I had this chili we were eating over at one of Steve's friend's house.  I had NEVER had chicken chili before and I was a little worried I wouldn't like it.  Naturally, I only put a very small amount in my bowl so if I didn't like it I could just say I wasn't all that hungry. I think I had three bowls! It was so yummy and I've been making it ever since.

Another thing I love about this chili (and soups in general) is that it's great re-heated and a great lunch for me to take to work.  It's hardy, filling, tasty, and only takes a few minutes in the microwave and tastes just as good as the first day I made it.

White Chili
Printable Recipe 

Ingredients:

4 chicken breast, shredded*
2 cans Great Northern Beans (15.5 oz each), drained
1 can white corn (15 oz), drained**
1 can green chili peppers (4 oz)
1 can chicken broth, low sodium (15 oz)
1 can cream of chicken soup (10 3/4 oz)
salt & pepper

Directions:

Put all ingredients in crock pot and cook on low 6-8 hours.

Add salt & pepper to taste

*I put my chicken breast in whole and then shred them after cooking 6-8 and add them back into chili.
**I used regular yellow corn because I didn't have the white corn

Serve in a bowl and sprinkle some cheese on top :)


And in case you didn't already know, make sure you look before backing out of your garage, I wouldn't want you to back into someone and feel like an idiot because that's how I'm feeling. Hope you're having a good week!

Friday, September 23, 2011

Spicy Roast

When a coworker first told me about "Spicy Roast" I knew I had to try it out.  However, when she told me the 3 ingredients I was doubtful.  How can a dish with only 3 ingredients be good? Much to my surprise, this roast was just what I needed.  It was SUPER-DUPER easy-your crock pot does all the work and it was so tasty.  

If you don't have a crock pot, you may want to invest in one.  You don't have to get an expensive one; in fact around the holidays they go on clearance at a lot of stores.  I work at a large chain pharmacy and last year ours went on sale for $5.00!!!! I was going to buy one to have an extra but a customer bought all 7 we had in stock.  I received my crock pot as a shower gift when I was getting married and it's definitely one of the best gifts we got.  I always felt like using a crock pot wasn't really cooking and it was just for the lazy person.  That was until I was working full time, had a very high energy, demanding dog, and a husband to feed.  Your crock pot is your best friend!  Not to mention, it makes tasty roasts, ribs, chili, soup, etc. 


these 4 things are all you need for a yummy dinner
 Spicy Roast


Ingredients:

Pot Roast, 3-5 lbs.
1 package Auju sauce
1 jar pepperoncini peppers 

Directions:

Place all ingredients in crock pot and cook on low 6-8 hours
Do not make the Auju sauce, simply sprinkle the powder over roast, do not add any water and do not drain peppers.


Cooking the roast in the crock pot all day makes it tender and moist and the sweetness of the peppers was lovely.  This dish is full of flavor and re-heats well for a nice leftover lunch, add a bun and have yourself a nice sandwich :)

Do you have a favorite crock pot meal? Don't forget to enter my fall giveaway.


Monday, September 12, 2011

Pizza Revisited


I love pizza, don't you?  When Steve was in college had it not been for frozen pizzas I think the boy would have starved to death.  I probably would have too for that matter; we ate A LOT of pizza!  I love ordering pizza from time to time - usually when I'm in a "no cooking" mood or when we've been busy all day and I forgot to plan something for dinner.  I really enjoy going out to a pizza pub on campus
called Pazzo's (we only live about 20 minutes from The University of Kentucky) and once in a while, when we're really craving a good pizza we'll drive there.  However, most times when we want pizza I make it at home.  I never knew how simple homemade pizza could be until I tried it.  Have I mentioned how cheap it is?
Depending on what toppings you like,you can make a pizza for less than $5.00.  You can't go out or have one delivered for that price...actually, you can't buy a "good" frozen pizza for that price either.  And trust me, the homemade ones are much better than delivery or frozen.  When I make a batch of the sauce, it usually lasts 3-4 pizzas, the mozzarella cheese I use will go for 2 pizzas, the pepperoni will make 4-5 pizzas, and when I make the dough, I make enough for 4 pizzas (I double the original recipe).  The most expensive item is the mozzarella cheese but often I have a coupon because my store sends me coupons for the items I buy most often :) YAY!
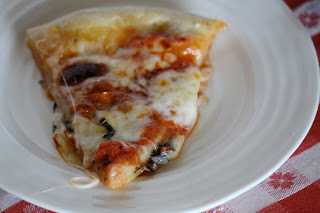
Since summer is almost over, my basil plants are starting to show signs of their departure but I can't stand the thought of wasting their produce, so I decided to collect some and freeze it.  I've never frozen any herbs before, so we'll see how it turns out.  I decided to use a little bit on the pizza I made the other night for dinner.  It was one of those things I chose not to tell Steve, because if I had, he probably would have turned his nose up and said something like, "Why did you have to go and ruin a perfectly good pizza?" Instead, after devouring his first slice (we aren't the most proper of people when eating) he asked, "Hey, what's this little green stuff?" He didn't seem to mind the basil, in fact he said he couldn't really taste it...not sure how that was the case.  I thought the basil gave the pie a little something special.

I also changed the sauce just a bit.  I had bought a can of fire-roasted tomatoes awhile back and had been trying to figure out what to use them for (please note I no longer purchase things without already having a recipe in mind because that's when I normally end up wasting money).  The sauce was good and if the fire-roasted tomatoes are on sale again, I'll get them.


The recipe for the dough and sauce are found on this post.  Like I said, I just used fire-roasted tomatoes instead of whole tomatoes.  I also don't measure the dried oregano- I just keep adding it in until I like the taste, same goes for the salt and pepper of course.  I hope you'll give homemade pizza a try! Your tummies and your wallets will thank you :)

Wednesday, August 17, 2011

Pot Roast & Birds Eye Review

I'm what some might call the black sheep of the family when it comes to food.  Everyone in my family loves meatloaf and pot roast.  Until two years ago, if you asked me what my two most hated foods were it would be meatloaf and pot roast.  Pot roast definitely being my most hated food! My mom made roast a lot growing up, my brother can eat a WHOLE roast.  If you think I'm exaggerating, I assure you I'm not.  The look of it always threw me off and I despise cooked potatoes and carrots together with the roast.....EWWWW!!! 

You already know from this post how I came to eat meatloaf and now I actually like it and look forward to eating it.  Roast has been a little harder for me to overcome.  I'm still working on it and I've actually made it twice and ate a regular portion without covering the meat in ketchup or gagging as I swallow :) In fact, when I made this Friday night I enjoyed my roast! YAY!!!  This is very exciting since everyone else in my family loves this dish.  I cook mine differently-no carrots or potatoes.  I just use pot roast, seasoning, beef stock, one onion and thyme.  It's yummy and super easy!

Let's pause a moment and talk about side items.  A lot of time I don't really make side items because Steve and I can't eat them and a main dish without wasting a lot of food.  The good folks at Foodbuzz Tastemaker sent me some Steamfresh Chef's Favorite by Birds Eye this past week.  ***Please be aware that all opinions of the product are my own and I have not been paid to give a favorable review.***  I decided to try out the Primavera Vegetable Risotto to go along with my pot roast. I have to say I was a bit skeptical about this selection because as I've already mentioned I don't like cooked carrots and I also don't like peas.  That being said, you can imagine my delight when I tasted this risotto and found that I loved it!  The rice was very creamy and the carrots and peas were really good as well-not all mushy, cooked but yet still firm.  I can't wait until these Birds Eye steamer bags are available at the store this September because I will definitely be getting some more.  I did mine in the microwave which impressed me even more because I have never been big on microwave meals of any kind.  Usually things you pop in the microwave come out mushy, overcooked, or undercooked. Luckily, this steambag works great and resulted in a dish that taste like it was homemade! I was VERY impressed. 


Pot Roast
Printable Recipe 

Ingredients:

3-6 lb. pot roast 
extra virgin olive oil
Weber Steak N' Chop Seasoning*
5-6 fresh thyme sprigs
1 box beef stock
1 onion, quartered

*Use any seasoning you like, salt and pepper works just fine

Directions:

Preheat oven 300 degrees F.

Heat dutch oven on medium heat and add about 2-4 tablespoons olive oil.

Add roast and onions, brown on all sides.

Remove from heat and add 1 box of beef stock and thyme sprigs (I bundle mine with kitchen twine so it's easy to remove).

Cook for 3 1/2-4 hours (if using 3 lb. roast), 5-6 hours if using larger roast, until fork tender.  Remove thyme bundle and serve.  You can also cook in a crock-pot (slow cooker) on low 6-8 hours if you don' want your oven on all day. 

Serve over rice and spoon juices from roast on top! I also like to add some hot sauce to mine :) YUM!!


Monday, August 15, 2011

Chicken Pilaf

Are you ready for summer to be over? I AM!!! I couldn't wait for the warm weather and sunshine but I've had enough and I can't wait for fall. I'm sure by late November I'll be complaining it's too cold but right now I welcome the cold weather.  I am sick of sweating all day even at 10:00 PM it's still to hot and humid to enjoy sitting outside on the patio.  :( Even Greta is over the heat, she can't enjoy being outside for more than an hour before she's laying in the shade heaving.  Poor pup.

I've been trying to get rid of some over-stock in the pantry so the other night I made some pilaf (from a box) and added in some chicken and cheese...YUM!

made your pilaf per box directions


Add cheese
Add chicken
 I put 4 chicken breast in a crock pot with salt pepper and half a box of chicken stock and cooked on low all day.  After I made the pilaf and added grated Parmesan cheese I just shredded the chicken breast with a fork and added it in as well. 

I'm really liking these quick and easy meals :)  What have you been making this summer?

Wednesday, August 10, 2011

Chicken, Peppers, & Onions

This summer I've been extremely lazy in the kitchen.  I don't know if it's the extreme heat or what but when I come home from work the last thing I want is to get into the kitchen and cook up a time-consuming meal.  I know that sounds horrible, but it's just the truth.

So, I just decided to cook up some chicken breast, onions, and bell peppers in the skillet the other night and called it dinner.  It wasn't too heavy and yet it was very satisfying.  Perhaps I'll be making more of these easy, light meals...who knows?
I'm not really sure you can even call this a recipe.  I simply chopped up  2 chicken breast, an onion and 3 sweet bell peppers and seasoned the chicken with salt and pepper and tossed it all in the skillet with some extra virgin olive oil.  About 10 minutes later, dinner was served! I added some Italian parsley for garnish and called it a night.  And it was delicious. 

Next time you're not feeling like really cooking or cleaning a lot of dishes afterward just make this :)

Monday, July 25, 2011

Chicken Casserole


Steve hates broccoli...I love it! It's really one of the few things we don't agree on and I usually don't get to cook with it often because he truly hates it so much.  I have cooked it alone, with other things, with tons of cheese melted on top, added to dishes and although he has bravely tried them all he just doesn't like it.  It's a texture thing-I understand completely (I'm a texture girl myself) but my love for broccoli made me determined that I could get him to like it....FAIL!

Thursday night I came home from work to make this chicken casserole and although I really really really wanted to add broccoli to the dish I knew Steve wouldn't like it and probably wouldn't eat it. Since he's been working 60 + hours, outside in this unbearable heat every week he really needs some good tastin', nutritious food.  But then I thought, "If I leave the florets whole and don't chopped them down he can just eat around them." With a huge grin, I defrosted the broccoli in the microwave and I was a happy girl. Guess what? Steve didn't even complain about the broccoli, he ate some of it and loved this dish! SCORE! This is my favorite chicken casserole yet and trust me, I've had a lot of chicken casseroles.  Just about any variation you can dream up, I'm sure I've tried it. This one is the best-well it's the best for me anyway. :)
 
Like most things I make, you can really change this up to suit your taste. If you don't like broccoli, leave it out...add what you like (carrots, celery, corn, etc). If you don't like cheddar cheese (does anyone really not like cheddar cheese?) then change that too. Use what you like and serve it up!

Chicken Casserole
Printable Recipe

Ingredients:

1 tbsp olive oil
1 small onion, diced
1 or 2 cloves garlic, grated or finely minced
1 bag frozen broccoli florets (thawed)
5 or 6 chicken breast (cooked and shredded)*
2 cups white rice, steamed
salt & pepper to taste

Sauce:
2 or 3 tbsp butter
1/8 cup flour
salt & pepper
1 can chicken broth (10 3/4 oz)
2-3 cups cheddar cheese, shredded

*I put my chicken in a slow cooker (crock-pot) with a can of chicken broth and cook on low all day (while I'm at work)

Preheat oven 350 degrees F.

In a saute pan, heat olive oil in medium heat and saute onions & broccoli about 5-7 minutes, until soft.  Add in minced (or gated) garlic and cook for 1 more minute. 

Stir in chicken, rice, salt and pepper. I usually cook my rice in a large saucepan and add the onions and broccoli to it so I have more room to mix ingredients together.

Melt butter in a medium saucepan over medium, medium-high heat.  Whisk in flour and add salt and pepper.

Pour in chicken broth, whisking continuously.  Whisk until mixture is almost to a boil then add 1 to 1 1/2 cups cheese.  Stir until cheese is melted then pour over rice/chicken mixture.

Place in a  baking dish and top with additional cheese.

Bake 25-30 minutes or until cheese is melted.

Wednesday, July 13, 2011

The Steve-a-Rino

My husband doesn't cook often but there is one thing he makes that I like better than my own...grilled cheese! He makes the BEST grilled cheese sandwiches; I just love them.  A month or so ago (maybe longer, I don't recall) I didn't feel much like cooking and he wanted more than just your normal grilled cheese.  I was summoned to the kitchen and asked to try THE STEVE-A-RINO.  This grilled sandwich was GREAT and Steve came up with it all on his own.  Basically, he took everything in the fridge and put it on a sandwich: ham, pepperoni, spicy mustard, provolone cheese and mayo. - The fridge wasn't stocked well that week ;)

Sunday evening was yet another night that I just didn't feel like cooking and I hadn't really made plans to cook, so our options were very limited.  Steve grinned and said he would make us Steve-a-rinos :) This time we had some cheddar-pepper jack cheese that he added and it was amazing! There is one key ingredient to the grilled cheese and now to my husband's creation that may seem off-putting to some of you but trust me (I was a MAJOR skeptic) and just try it! Instead of buttering your bread, use mayo. Have you already tried this? I like mayo, but only on certain things and only in moderation. So, when I was first introduced to the concept to using mayo instead of butter on a grilled cheese I turned my nose up and said, "EWWW, HECK NO!"  Luckily, Steve was more daring and tried it....it's so much better than butter.  It gives you the same browning effect without being as greasy :) And if you don't like mayonnaise, that's okay too because you can't taste it!
The Steve-a-Rino
Printable Recipe 

Ingredients:

white bread
deli ham (we used Smoked)
pepperoni
cheddar-jack cheese
provolone cheese
spicy mustard
mayonnaise

Directions:

Heat a non-stick skillet on medium heat.

Spread a thin layer of mayonnaise on one side of two slices of bread. 

Place the mayo-side down on skillet and build your sandwich (ham, pepperoni, cheese, mustard, etc). Then place a second piece of bread (mayo-side up) on top.
cheddar-pepper jack cheese & ham

pepperoni

provolone

mustard

bread
Cook sandwich a few minutes on each side until golden brown.

Cut into two triangles (or leave whole if desired) and ENJOY!

Next time I'm adding bacon to mine , YUM! Mix it up, try different meats, cheeses, mustards, etc.
Hungry Puppy :) Sorry Greta, no Steve-a-Rino for you!
Hope you're all having a great week!

Monday, June 27, 2011

Roasted Chicken & Peppers

When I was younger if chicken wasn't on the table, I wasn't eating.  Well, I would eat the sides but chicken was the only "meat" I would eat.  Although I now consume almost any meat (however I don't eat fish), chicken is still my favorite! The first time I made roasted chicken I went by a recipe that had me cranking my oven up to 500 degrees F.  After about 20 minutes of cooking my entire kitchen house was filled with smoke and the only thing cooked was the skin (BURNED, actually)...the chicken itself was raw in the middle. Needless to say, I have no pictures of this lovely event to share because this all occurred quite some time before starting my blog.

The other evening I decided to try again, but this time I would just do my own thing and not go by any recipe.  My version turned out much better. YAY! The chicken was so tender and moist and the roasted peppers were almost like dessert they were so sweet-just the way I like 'em :)


Roasted Chicken & Peppers
Printable Recipe 

Serves 2

Ingredients:

2 bone-in, skin-on chicken breasts
3 bell peppers, sliced into 1/2 inch pieces
lemon pepper seasoning (about 1-2 tbsp depending on your tastes)
4 tbsp butter, softened
salt & pepper
olive oil

Directions:

Preheat oven to 400 degrees F.

Place peppers in a roasting pan* and place roasting rack on top of peppers, drizzle with olive oil and season with salt and pepper.

Mix butter and lemon pepper seasoning until combined.

Make a small opening in the chicken breast membrane between the skin and flesh of the chicken. Glide your finger down the chicken breast to make room to stuff the butter mixture into the chicken.  Place half the butter mixture in the opening you made in the chicken breast and smooth out by running your fingers over the skin of the chicken.  Do the same with the second chicken breast.  Rub a little butter on the outside of the skin for browning. 

Place chicken on the roasting rack and drizzle with olive oil and salt and pepper. 

Cook in oven for 45-60 minutes, or until meat thermometer reads 160 degrees. 

Place chicken and peppers on a plate and enjoy!


*If you don't have a roasting pan you can use a cookie sheet and cooling rack.
Kentucky Food Bloggers
Foodbuzz

Search This Blog

 
Designed by Munchkin Land Designs. Copyright 2011. All Rights Reserved.