Showing posts with label Dessert. Show all posts

Monday, May 2, 2011

Lemon Loaf Cake

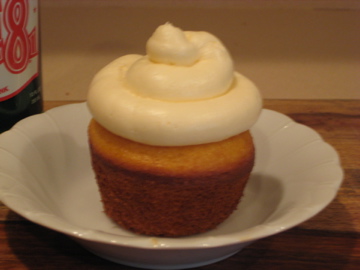
Can you see that yummy glaze on top?
If you need something refreshing to get your spring started off on the right foot...make lemonade THIS CAKE! I have made this a few times and it's always a hit!  Last week I took it to my Bible Study and the girls really liked it; my coworkers enjoyed the leftovers :) If you adore lemon-flavored goodies like I do then you will love this lemon infused cake (that has a lemon syrup) and a lemon glaze :) I know it sounds like maybe too much lemon, but it isn't.

These pictures have nothing to do with the lemon cake but they got me excited about spring so I thought I would share them with you.
blooms from my cherry tree :)

Loving Spring


love this picnic basket-a gift from Mom
I made this cake the night before and wrapped foil around my tray and it kept nicely this way so that I could easily transport it to Bible Study:


Lemon Loaf Cake 

Source: Willow Bird Baking

Printable Recipe

Yields: one 8-inch loaf

Cake Ingredients:
1 1/2 cups all-purpose flour
2 teaspoons baking powder
1/2 teaspoons kosher salt
1 cup sour cream
1 1/3 cups sugar, divided
3 eggs
2 teaspoons lemon zest
1/2 teaspoons pure vanilla extract
1/2 cup vegetable oil
1/3 cup freshly squeezed lemon juice

Glaze Ingredients:
1 cup confectioners’ sugar
2 tablespoons freshly squeezed lemon juice

Directions:
Preheat the oven to 350 degrees F. Grease an 8 1/2 x 4 1/4 x 2 1/2-inch loaf pan. Line the bottom with parchment paper and butter and flour the entire pan.

Sift the flour, baking powder, and salt together into a medium bowl. In a large bowl, whisk together sour cream, 1 cup of the sugar, eggs, lemon zest, and vanilla. Slowly add the dry ingredients into the wet, whisking to combine (I did this in 2-3 additions). Use a rubber spatula to fold the vegetable oil into the batter until it’s fully incorporated. Pour into the prepared pan and bake for about 50 minutes, or until a cake tester stuck in the center of the loaf comes out clean.

While the cake is baking, combine the 1/3 cup lemon juice and remaining 1/3 cup sugar in a small saucepan over medium heat and cook until the sugar dissolves and the mixture is clear. Set aside.

When the cake is done, allow it to cool in the pan for 10 minutes before removing it and placing it on a baking rack over a sheet pan. Use a cake tester, or toothpick to carefully pierce holes throughout the cake While the cake is still warm, pour the lemon-sugar mixture over the cake and allow it to soak in. Cool completely.   

In a small bowl, combine the confectioners’ sugar and lemon juice, whisking to form a smooth glaze. Pour over the cake. 

Wednesday, April 27, 2011

Chocolate Chip Cookies


If you only make one thing from my blog, make these cookies! I cannot explain how amazing they are!  Thick, chewy, HUGE, chocolate...YUM YUM YUM!!!  I adore these cookies-the only down side is that they are best when devoured the day you make them. Which isn't much of a bad thing because they won't last until the next day anyway :)

I have made many chocolate chip cookies in my day and none compare to these! I was actually on a quest one Saturday morning, "researching" on the Internet, trying to find the best recipe.  After about two hours of google searches I had the bright idea of looking at all my favorite blog sites (DUH, blonde moment, totally should have done this first).  Lo and behold, I found it here: Brown Eyed Baker.  I will never make another chocolate chip cookie again, unless it's this recipe.  There is one big key to these cookies: GOOD QUALITY INGREDIENTS!  I am all about buying generic/cheaper products with the exception of a few things-two of them are in these cookies: vanilla extract and chocolate.  Now, I always used the store brand chocolate chips and vanilla extract until after reading a few blogs I was convinced I would try the better brands and prove them wrong...one problem; I WAS WRONG! When it comes to vanilla extract and chocolate you MUST buy good quality.  It truly makes all the difference and once you've used the good stuff you won't turn back!
Chocolate Chip Cookies
Source: Brown Eyed Baker
Printable Recipe

yield: about 18 large cookies

Ingredients:
2 cups plus 2 tablespoons (10 5/8 ounces) unbleached all-purpose flour
1/2 teaspoon baking soda
1/2 teaspoon salt
12 tablespoons (1 1/2 sticks) unsalted butter, melted and cooled until warm
1 cup packed (7 ounces) light or dark brown sugar
1/2 cup (3 1/2 ounces) granulated sugar
1 large egg plus 1 egg yolk
2 teaspoons vanilla extract
1-1 1/2 cups semisweet chocolate chips  (I don't actually measure them, I just pour them in until I think there are enough)

Directions:

Preheat oven to 325 degrees F. Line 2 large baking sheets with parchment paper, baking mat, or spray them with nonstick cooking spray.

Whisk the flour, baking soda, and salt together in a medium bowl; set aside.

Either by hand or with an electric mixer (I use my stand mixer b/c I can just turn it on and let it do all the work), mix the butter and sugars until thoroughly blended. Beat in the egg, yolk, and vanilla until combined. Add the dry ingredients (I do this in two to three additions) and beat at low speed just until combined. Stir in the chips to taste. 

I'm in love with these silpat mats
Roll a scant 1/4 cup of the dough into a ball. Hold the dough ball with the fingertips of both hands and pull into 2 equal halves. Rotate the halves 90 degrees and, with jagged surfaces facing up, join the halves together at their base, again forming a single ball, being careful not to smooth the dough’s uneven surface. Place the formed dough balls on the prepared baking sheets, jagged surface up, spacing them 2 1/2 inches apart.

Bake until the cookies are light golden brown and the outer edges start to harden yet the centers are still soft and puffy, 15 to 18 minutes, rotating the baking sheets front to back and top to bottom halfway through the baking time. Cool the cookies on the sheets. Remove the cooled cookies from the baking sheets with a side metal spatula.  ENJOY!!
 

Thursday, April 14, 2011

Snickers & Reese's Cheesecake

I love sweets, dessert is definitely my favorite part of any meal.  Although it's a tough choice, cheesecake takes 1st Prize as my favorite dessert :)  When I saw this recipe on My Baking Addiction it was put on my must-make list and I have made it several times.  I had tried several different basic cheesecake recipes and although they were good, they were far more time-consuming and none turned out as good as this one.  This is my go-to recipe for any basic cheese and it can be jazzed up with candies or you can change up the basic trust with a chocolate crust too.
snickers cheesecake
The first time I made the snickers cheesecake (my favorite), the second time it was for my husband's birthday and he requested a Reese's variation.
Reese's
Snickers Cheesecake
Crust:
2 cups graham cracker crumbs (regular or chocolate)
1 stick unsalted butter; melted
3 tablespoons sugar
½ teaspoon salt

Cheesecake:
4 sticks of cream cheese, 8 oz each; room temperature
1 ¼ cup granulated sugar
4 large eggs; room temperature
3/4 cup heavy cream
1 tablespoon pure vanilla extract

Topping:
20 Mini Snickers; cut in fourths
1/3 cup roasted peanuts; chopped
1/4 cup caramel syrup

Directions:
1. Preheat oven to 350 degrees F. Tightly wrap a 9 inch springform pan in heavy duty foil. This step prevents leaks when using a water bath. You may want to place your foiled springform pan in an oven baking bag.- This ensures no water getting to your crust.
2. Mix together the crust ingredients and press into the bottom of your pan and about 1 inch up the sides. Bake for 7 minutes and cool completely on a wire rack.
3. Begin to boil a large pot of water for the water bath.
4. In the bowl of your stand mixer fitted with your paddle attachment, combine the sugar and cream cheese and cream together until smooth. Add eggs, one at a time, fully incorporating each before adding the next. Make sure to scrape down the bowl in between each egg. Add heavy cream and vanilla and mix until smooth.
5. Pour batter into prepared crust. Place pan into a larger pan (roasting pan if you have one, I used a disposable one) and pour boiling water into the larger pan until halfway up the side of the cheesecake pan.
6. Bake 45 to 55 minutes, the edges will appear to be set, but the center will still have some jiggle to it. At this point, close the oven door, turn the heat off, and let rest in the cooling oven for one hour. After one hour has passed, carefully remove the cheesecake from the water bath and place on a cooling rack to cool completely. Once the cake is completely cooled, place it into the refrigerator for at least 5 hours.
 7. Top with Snickers bars, peanuts and caramel.

*If you want to use Reese's instead of Snickers, chop about 20 small Reese's candies with a food chopper and sprinkle on top of cheese cake*

Storage:
A tightly covered cheesecake can be stored in the refrigerator for up to five days. The cheesecake can be stored for approximately 2 months in the freezer. I recommend you freeze this variation without the topping (Snickers, peanuts, caramel). To defrost, allow cake to defrost in the refrigerator overnight.

Wednesday, April 13, 2011

Fruit Pizza

Spring has finally sprung, or at least for a week!  The weather here has been warm, accompanied by spring showers.  I'm not a big fan of the rain but I am looking forward to seeing my flowers bloom :) Here in Kentucky the weather changes from day to day.  Yesterday for example:  when I went to work it was almost 70 degrees, at lunch it was in the lower 60's! Today it's warmer again and should continue to stay warm, at least until this weekend.  We have had April snows before and sometimes we get a day or two of 70 degree weather in January! You just never know what you're gonna' get.  Keeps you on your toes and surprised, that's for sure. 

Anyway, I am very happy that it's getting warm and because of this I have been looking through all my recipes that include fresh fruits and veggies :) Here is one of my favorites and it's so super easy!  I got this recipe from a lady I used to work with, she made them better (although I use the exact recipe) somehow hers managed to always taste better than mine!

Peggy's Fruit Pizza
Printable Recipe

Ingredients:
1 Pillsbury sugar cookie package (pre-cut)
1 brick cream cheese (8 oz)
2 tbsp FRESH lemon or lime juice (do not use the store bought stuff, there is a huge taste difference)
1/2-3/4 cup powder sugar
strawberries
blueberries
kiwi

*you can use any fruits you like, these are just what I prefer*

Directions:

Bake the sugar cookies according to package directions on cookie sheet (If you would like to make one large pizza, allow cookie dough to soften then roll out into a circle or rectangle, bake on a cookie sheet or pizza pan with same package directions)

In a large bowl (a stand mixer makes this super easy) mix together cream cheese, 2 tbsp lemon or lime juice, & powder sugar

Stir the icing until creamy and spread on to cookies with spatula

Add your fruit of choice to cookies & ENJOY!

Keep refrigerated up to 3 days in air-tight container (you won't make these last 3 days, TRUST ME)

Don't forget to enter my giveaway before Friday, if you haven't already done so!

Tuesday, March 29, 2011

Surprise Monkey Bread

 
 Do you have a favorite recipe that you don't even use a recipe for? If I had to choose one go-to dessert (this could be breakfast too, or lunch or dinner, hehe) that I no longer read the actual recipe for it would be this yummy ring of goodness!  I first made this for a snack party at my former job and it was an instant hit. In fact, at every snack party I was asked to bring this.  I was watching TV tonight with my hubby and it hit me....MONKEY BREAD, MUST MAKE NOW!  So, I headed to the kitchen and whipped this up.  I had to find the original recipe in order to post.  Although I use the same ingredients the amounts tend to change and vary each time I make this depending on my mood. Shall I add more brown sugar, more cinnamon, no walnuts, etc...you get the idea.  You could really add or omit any of the ingredients depending on your personal tastes, another reason I love this so much....adaptability (is that even a word?)
Ingredients
Depending on what's in the frig, I sometimes use extra flaky buttermilk biscuits, grands, really just whatever I have on hand.  Sometimes I don't have walnuts, chopped peanuts are nice as well.  So is caramel sauce instead of brown sugar/butter combo.  Although this is a pretty good treat warmed up the next day, if I'm taking this to work or a social gathering there are NEVER leftovers.  So, if you want to take this somewhere and want to have some yourself, just make two :)

Another reason I love this, as if I need another reason aside from the brown sugar, cinnamon/sugar combo (so delish) is that if you don't like cream cheese, or you THINK you don't, you will change your mind after this.  My step-dad claims to loath cream cheese, as did many of my fellow co-workers.  When asked what the "surprise" component was, a HUGE, yet evil grin came to my lips as I stated. "That would be cream cheese, a whole brick of it!" YAY, score for cream cheese! I personally LOVE cream cheese and often spent many summer lunches in the kitchen making cream cheese and olive sandwiches with my Grandmother, but that's another story for another day.  

So, go ahead and make this. You can thank me now or later, I'm not picky ;)

Surprise Monkey Bread
Printable Recipe

Source:  Taste of Home Prize Winning Recipes, April 2010
Ingredients:

1 cup packed brown sugar
1/2 cup butter, cubed
2 tubes refrigerated biscuits
1/2 cup sugar
1 tbsp ground cinnamon
1 package (8 oz) cream cheese, cut into 20 cubes (if each biscuit tube has 10 biscuits)
1-1/2 cups chopped walnuts (optional)

Preheat oven 350 degrees F

Melt butter and brown sugar in a microwave-safe bowl until the sugar is dissolved.  I start on 2 minutes on 50% power and then go longer in 30 second increments.  Set aside. 
brown sugar & butter
Combine cinnamon and sugar, set aside.

Flatten each biscuit into a 3 inch circle and sprinkle 1/2 tsp of cinnamon/sugar mixture in the middle of the circle and spread so the whole biscuit is covered.  Top with 1 cream cheese cube then fold dough over filling; pinch edges to seal tightly. 

Sprinkle 1/2 cup walnuts into a 10 inch fluted tube pan coated with non-stick cooking spray.  Layer with half the biscuits, cinnamon/sugar mixture, & butter/brown sugar mixture and 1/2 cup walnuts.  Repeat layers.
 
layer one


add brown sugar/butter mixture
layer two


Bake 40-45 minutes or until golden brown, invert pan onto serving dish and enjoy! Best served warm

Oh, so yummy.

Monday, March 28, 2011

Ale-8 Cupcakes

If you're from Kentucky then you know what Ale-8 is, if you aren't from Kentucky then you probably don't-considering it's mostly sold only in Kentucky.  It's a ginger-blended soda and I adore it.  Most people I know either love it or hate it, there are few that can take it or leave it.  Although it's produced in plastic bottles and aluminum cans, I prefer the glass bottle :) I also love this drink because it's made in Winchester, Kentucky which isn't far from where I live and the best part.... you can buy it in a vending machine for only 75 cents! What other drink can you purchase in a glass bottle for that cheap?  Please visit Ale-8 for more info. on my favorite drink.

I decided to make these cupcakes but using a box yellow cake mix and following the regular directions and just substituting the water with Ale-8, however the taste was not very strong so I had to add more Ale-8. These were made with a Swiss Meringue Buttercream frosting that next time will have some added Ale-8 as well.

Here's what you need for the cupcakes, I forgot to include ginger, sorry!


Ale-8 Cupcakes 
Printable Recipe 

*makes 18 regular size cupcakes*

Ingredients

For Cupcakes:
1 box yellow or white cake mix
3 eggs
1/3 cup oil
1 cup Ale-8
1 tsp fresh ginger (grate with micro-plane zester)


For Swiss Meringue Buttercream*
5 large egg whites
1 cup plus 2 tbsp sugar
pinch of salt
1 lb (4 sticks) unsalted butter (cut into tablespoons) at room temp
1 1/2 tsp pure vanilla extract
1/2 tsp fresh ginger

Directions:

Preheat oven 350 degrees F

Make the cupcake batter by box directions (leave out the water and replace with Ale-8) and add 1 tsp grated fresh ginger

Spray cupcake tin with non-stick cooking spray or use liners.  Fill each cupcake tin with about 1/4 cup of batter and bake per box directions (about 18-20 minutes, rotating pans half way through)  When a cake tester or tooth pick comes out clean from center of cupcakes, they're done.

Frosting Directions:


Combine egg whites, sugar, and salt in a heatproof bowl (bowl of stand mixer) and place over pot of simmering water (make sure the water is not touching the bottom of your bowl).  Whisk constantly by hand until mixture is warm to the touch and sugar has dissolved.


Attach the bowl to your stand mixer and use whisk attachment.  Start whisking on low and gradually increase speed to medium-high, whisk until stuff peaks form.  Continue mixing until the mixture is fluffy and glossy, and completely cool.  This takes about 10 minutes.

With mixer on medium-low speed, add the butter a few tbsp. at a time.  Before adding more, make sure it's completely incorporated.  Once all the butter is added, whisk in vanilla.  Switch to paddle attachment and beat on low speed until all the air-bubbles are gone.  This takes about 2 minutes.  Scrap down with spatula and continue beating until frosting is smooth. 

Keep buttercream at room temp. if using the same day. If not, refrigerate and bring to room temp. before using.

Pipe icing or decorate cupcakes as desired.  I used a 1A Wilton tip with a piping bag :)


Allow cupcakes to cool on wire racks completely before frosting.

*Swiss Meringue Buttercream recipe from Martha Stewart's Cupcakesclick here to check out the book

Saturday, March 19, 2011

Cinamon Sugar Pull-Apart Bread


If you want a simple yet delicious treat MAKE THIS! Not next week, tomorrow, or even in an hour, make it right now.  It's that good, trust me (I ate the whole loaf myself, well almost).  I was browsing through some of my favorite food blogs and when I saw this over at Joy The Baker I knew it was going to be a match made in heaven.  If you don't know me then you don't know about my love affair with cinnamon & sugar.  I love almost anything that is made with these two ingredients. This is now a new favorite.

Cinnamon Sugar Pull-Apart Bread
 Printable Recipe
source: Joy the Baker 
*The only change I made was leaving out the nutmeg 

Dough:
  • 2 3/4 cups plus 2 tablespoons all-purpose flour
  • 1/4 cup granulated sugar
  • 2 1/4 teaspoons active dry yeast
  • 1/2 teaspoon salt
  • 2 ounces unsalted butter
  • 1/3 cup whole milk
  • 1/4 cup water
  • 2 large eggs, at room temperature
  • 1 teaspoon pure vanilla extract
 Filling:
  • 1 cup granulated sugar
  • 2 teaspoons ground cinnamon
  • 2 ounces unsalted butter, melted until browned


In a large mixing bowl whisk together 2 cups flour, sugar, yeast, and salt.  Set aside.
Whisk together eggs and set aside.

In a small saucepan, melt milk and butter until butter has just melted.  Remove from the heat and add water and vanilla extract. 

 Let mixture stand for a minute or two, or until the mixture registers between 115 to 125 degrees F.

Pour the milk mixture into the dry ingredients and mix.  Add the eggs and stir the mixture until the eggs are incorporated into the batter.  The eggs will feel soupy and will seem like the dough and the eggs are never going to come together.  Keep up the stirring, it will come together.  Add the remaining 3/4 cup of flour and stir for about 2 minutes.  The mixture will be sticky.  

Place the dough is a large,  greased bowl.  Cover with plastic wrap and a clean kitchen towel.  Place in a warm space and allow to rest about 1 hour, or until dough is double in size.  *The dough can be risen until doubled in size, then refrigerated overnight for use in the morning.  If you do this, let the dough rest on the counter for 30 minutes before following the roll-out directions below.

While the dough rises, whisk together the sugar, cinnamon. Set aside.  

Melt 2 ounces of butter until browned.  Set aside.  Grease and flour a 9x5x3-inch  loaf pan.  Set aside.

Deflate the risen dough and knead about 2 tablespoons of flour into the dough.  Cover with a clean kitchen towel and let rest for 5 minutes.  On a lightly floured work surface, use a rolling pin to roll the dough out.  The dough should be 12-inches tall and about 20-inches long.  If you can't get the dough to 20-inches long... that's okay.  Just roll it as large as the dough will go.  Spread melted butter across all of the dough.  Sprinkle with all of the sugar and cinnamon mixture.  

Slice the dough vertically, into six equal-sized strips.  Stack the strips on top of one another and slice the stack into six equal slices once again.  You'll have six stacks of six squares.  Layer the dough squares in the loaf pan like a flip-book.  Place a kitchen towel over the loaf pan and allow in a warm place for 30 to 45 minutes or until almost doubled in size.   

Place a rack in the center of the oven and preheat to 350 degrees F.  Place loaf in the oven and bake for 30 to 35 minutes, until the top is very golden brown.  The top may be lightly browned, but the center may still be raw.  A nice, dark, golden brown will ensure that the center is cooked as well.  

Remove from the oven and allow to rest for 20 to 30 minutes.   Run a butter knife around the edges of the pan to loosen the bread and invert onto  a clean board.  Place a plate (or whatever you wish to display this yummy loaf ) on top of the  upside down loaf, and carefully invert so it's right side up. 

*Try not to eat the whole loaf in one sitting, if you can resist! :) 

Sunday, March 13, 2011

Orange Crunch Cake

Have you eaten something at a restaurant and thought you had to duplicate it at home? While on vacation in Captiva, my sister-in-law told us about a place called The Bubble Room; it's a very unique restaurant and they have amazing desserts.  Although we did not eat dinner there, we did visit twice to get dessert! The first night I picked their famous Moist Chocolate Cake although the Orange Crunch was recommended to me.  The Orange Crunch looked amazing but Chocolate was calling my name.  The Chocolate Cake was great but two nights later when we returned I took home the best piece of cake I have ever had-THE ORANGE CRUNCH! WOW, the chocolate cake did not compare to this amazing cake! So moist with the sweet taste of orange and the crunch-what's better than walnuts and brown sugar!? The icing was my favorite part. It resembled a less firm, almost fondant texture but unlike fondant this icing was good (I have never met a fondant icing I liked, always tastes like cardboard to me).  It was firm yet creamy with just the right amount of orange flavor. I knew I had to make this at home.  I did a google search and found many recipes, all about the same but what concerned me was the icing.  I looked and looked but didn't find an icing recipe that I thought would be the right one, but I tried it anyway.  Although the cake I made was very good, it was not exactly like the one from the Bubble Room :(  No worries, I will continue my search and when I hit the jack pot I will be sure to let you know! But, until then, here is my closest version of the Orange Crunch Cake from the Bubble Room.

Finished Product

ingredients
The Crunch
Mixing Away
Put wax paper until the edge of your cake so you don't make a mess of your cake stand, I learned this tip from Ina Garten
So Yummy!

Orange Crunch Cake
adapted from  Food.com (I doubled this to make 3 layers & had extra left over)

Crunch Layer:


  • 2 cups graham cracker crumbs


  • 1 cup brown sugar


  • 1 cup walnuts, chopped


  • 1 cup butter, melted   


  • Cake:


  • 2 yellow cake mixes


  • 1 cup water


  • 1 cup orange juice


  •  2/3 cup vegetable oil  


  • 6 eggs


  • 4 tablespoons orange zest


  • Frosting:


  •  2 (16 ounce) can vanilla frosting


  •  2 (8 ounce) container frozen whipped topping, thawed


  • 6 tablespoons orange zest


  • 2 teaspoon lemon zest


    1. Combine crunch layer ingredients. Press 1/3 into each bottom of 3 greased and floured 8" or 9" pans.
    2. In stand mixer, blend cake ingredients at low speed until moistened. Beat 2 mins at high speed. Pour into pans.
    3. Bake at 350 degrees for 30-35 minutes Cool 10 minutes Remove from pans and cool completely. 
    4. In a large bowl (or stand mixer), mix frosting & topping. Fold in lemon & orange zest.
    5. Place one layer, crunch side up, on plate. Spread with 1/3 frosting. Repeat two times and enjoy!


    I need some icing lessons :)


    I hope everyone had a great weekend! I must give a shout out to my Kentucky Wildcats for winning the SEC tournament!
    Kentucky Food Bloggers
    Foodbuzz

    Search This Blog

     
    Designed by Munchkin Land Designs. Copyright 2011. All Rights Reserved.